Getting Started with Flask and Python on Flightcontrol
After following this guide, you will have deployed a basic Flask/Python web application on Amazon Web Services (AWS) using Flightcontrol.
If you need to build a Flask project to follow the guide, we have a short tutorial on Creating a Flask App for you to follow. Otherwise, all you need is your own Python/Flask project in a Git repository (either private or public).
We’ll use Flightcontrol to deploy the application from that Git repository to AWS.
Setting up the Flask Application for Deployment
There are a couple of steps we need to follow to get our Flask application ready for deployment.
Using Gunicorn as the Web Server
To deploy your Flask application in production, you will need a web server to serve your application. We’ll use Gunicorn, a Python web server. Install Gunicorn with pip if you need it:
pip install gunicornSetting up the Host and Port Number
You will also need to make sure that your Flask application accepts traffic correctly.
At the bottom of your app.py file, add (or modify) the following code to set the host to be '0.0.0.0' and the port to be 3000:
if __name__ == "__main__":
    app.run(host='0.0.0.0', port=3000)
Creating a wsgi.py File
We’ll also need to create a Python file named wsgi.py with the following contents:
from app import app

if __name__ == "__main__":
    app.run()
Adding a Procfile
Nixpacks can use a Procfile to determine how to run your application.
A Procfile is a simple file that contains a one line command, along with the name of the service to use. With a service named web the contents of the Procfile will be:
web: gunicorn --bind 0.0.0.0:3000 wsgi:appDeploying a Flask Application with Flightcontrol
To create a Flightcontrol account, sign up at the Flightcontrol Dashboard.
After you have an account created, you can create a new project and deploy your Flask application to AWS.
If you haven’t connected your Flightcontrol account to GitHub yet, let’s do that now. Be sure to authorize access to the Flask repository you plan to deploy.
Follow our guide on Connecting Flightcontrol to GitHub to walk you through the necessary steps.
Once you have GitHub connected, you’ll see a list of all of the Git repositories that the Flightcontrol Ops app can access.
Creating a Project on Flightcontrol
Each Flightcontrol project contains one or more applications that you want to run on AWS. Within each project, you can have multiple environments. For example, you might have a staging environment and a production environment. Each environment can have one or more services, such as a web front end, a web back end API layer, or a relational database.
On the Flightcontrol dashboard, create a new project with the Create Project button.
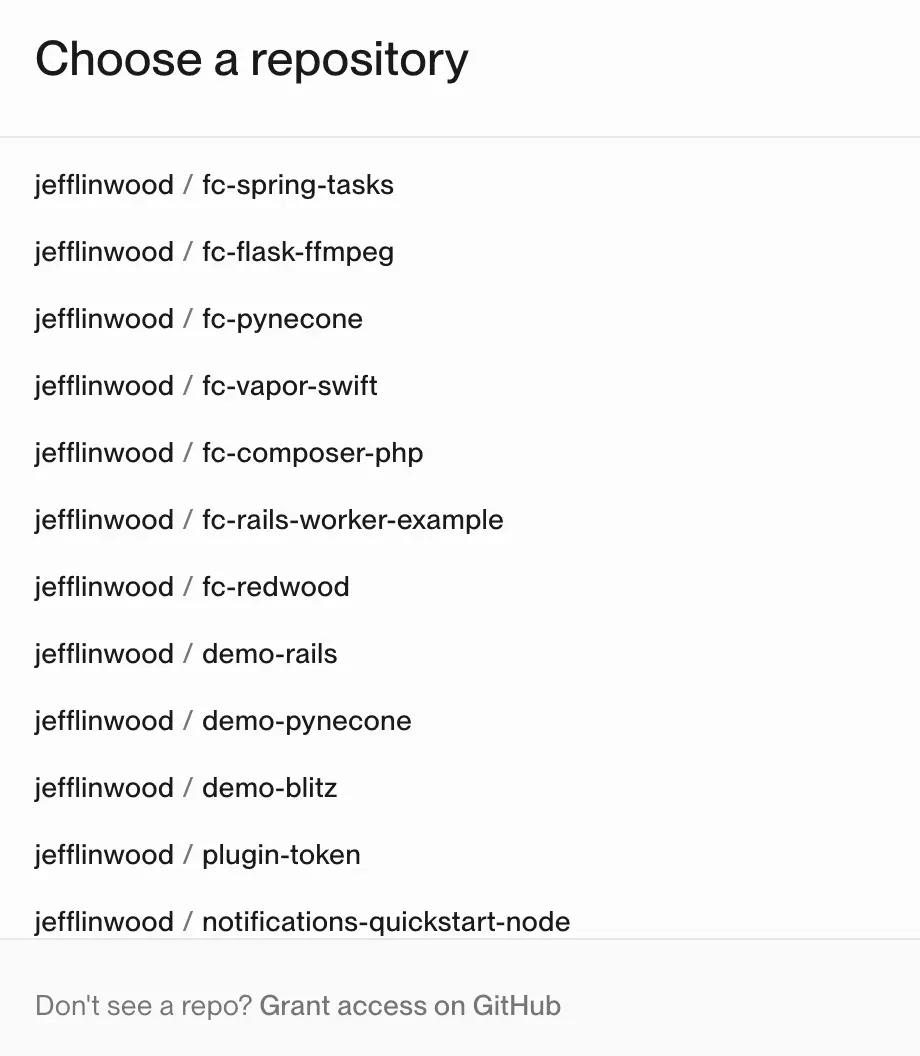
Choose your Flask repository to continue.
Configure your Project
The next screen configures the project level settings for your application.
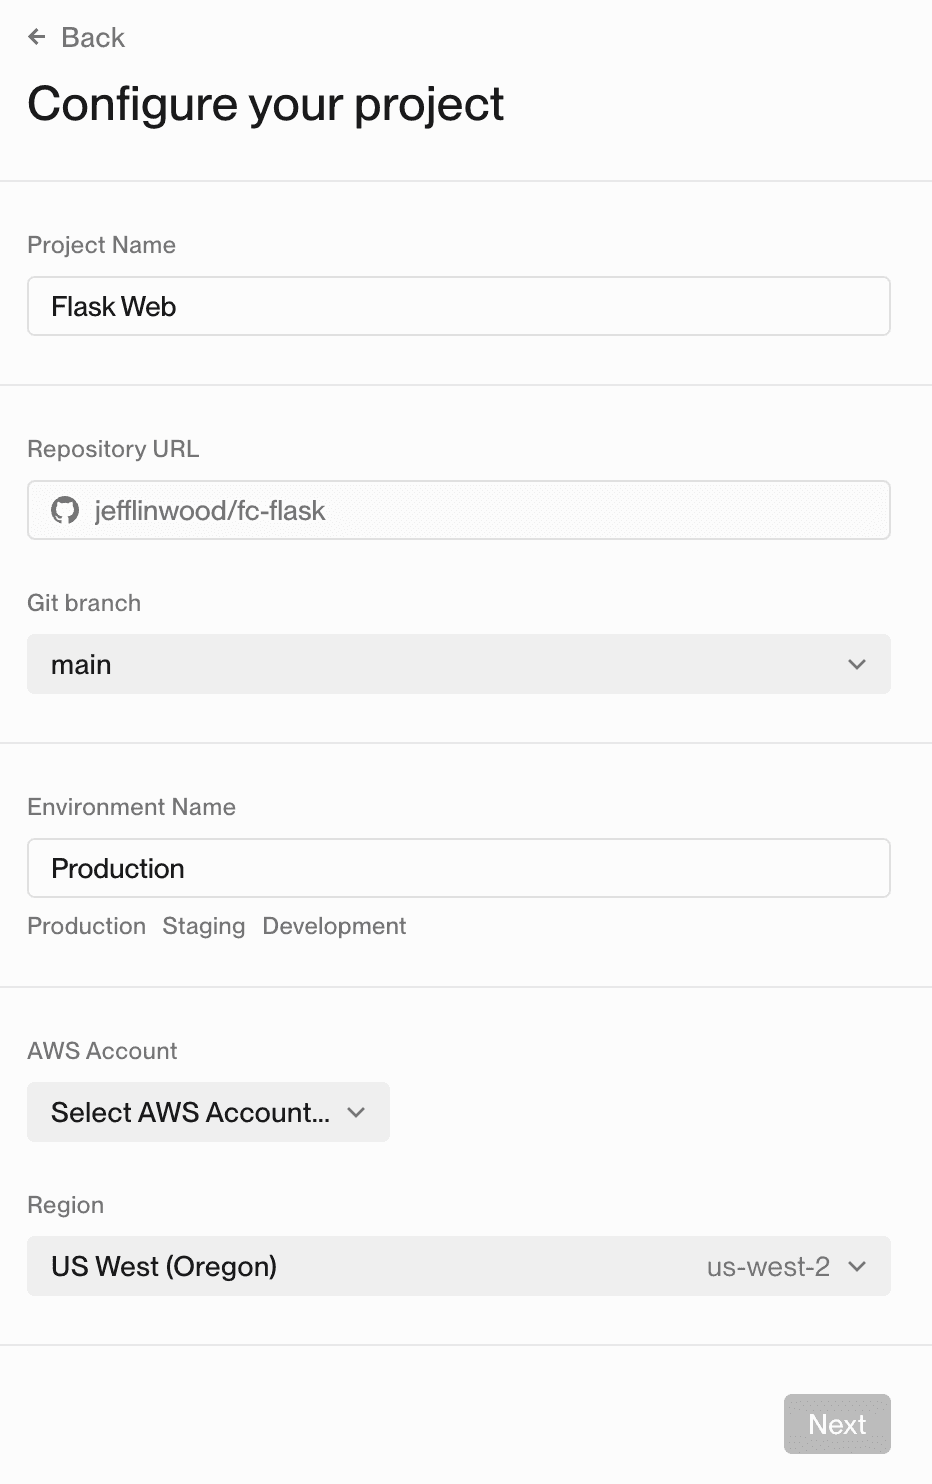
When it comes to an environment - you can choose to use the environment name that makes sense for your project deployment.
For this Flask guide, we’ll choose “Production”.
You will need to choose an AWS account for the project, as well as an AWS region to deploy to (such as us-west-2).
Click the Next button to continue. You will get a list of presets to choose from - for this guide, we’ll need to choose the Build your own option at the bottom of the dialog box.
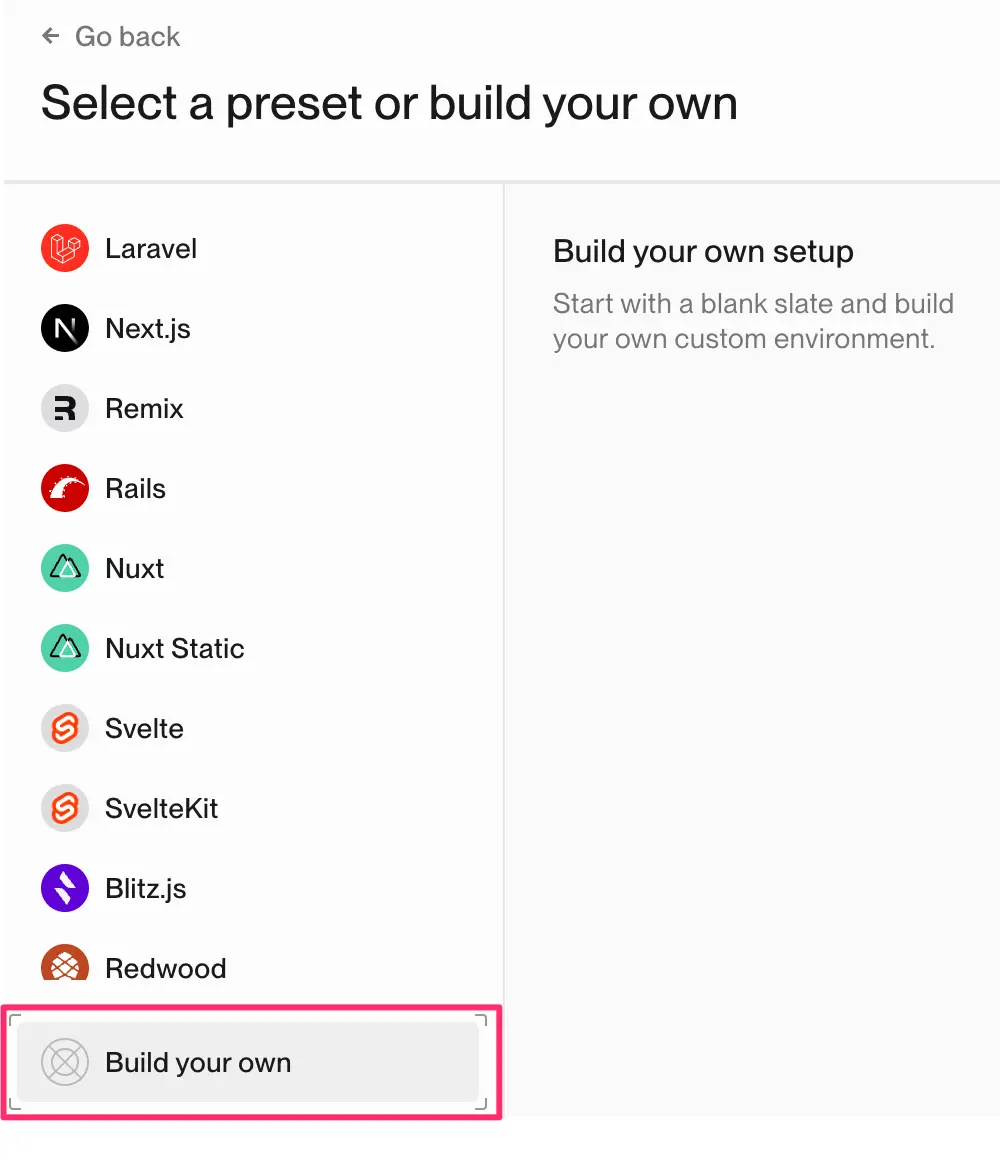
Click Build your own to continue.
Adding a Flask Web Server Service
On the next screen, you’ll see the option to add services. We will add a Server service, which is for a web application that runs on an HTTP port. Other service options include workers, static sites, databases, and Redis servers.
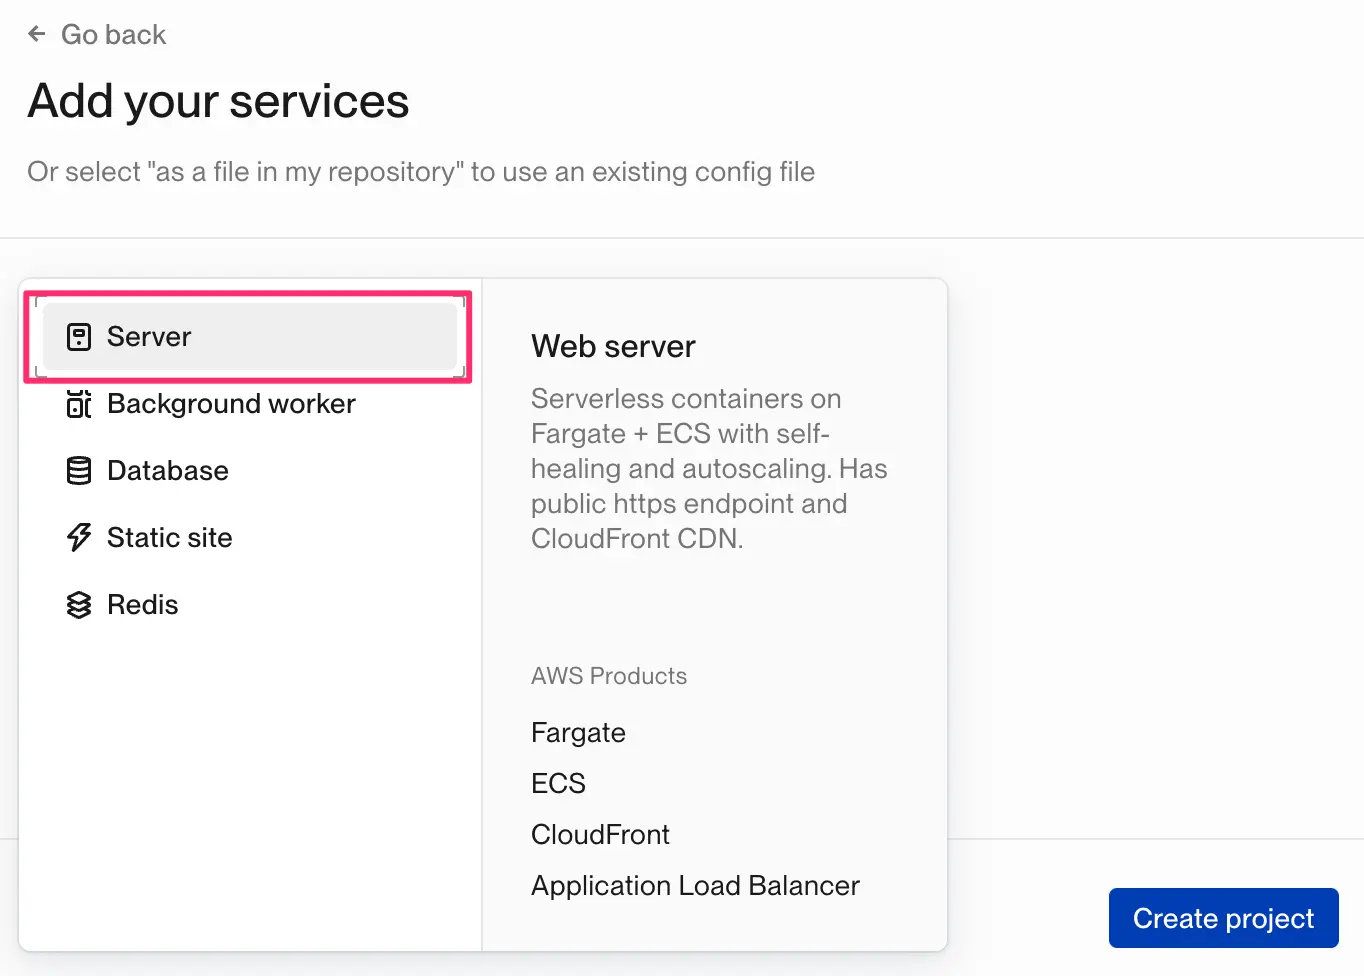
After choosing a Server service, the Web Server dialog appears with configuration options.
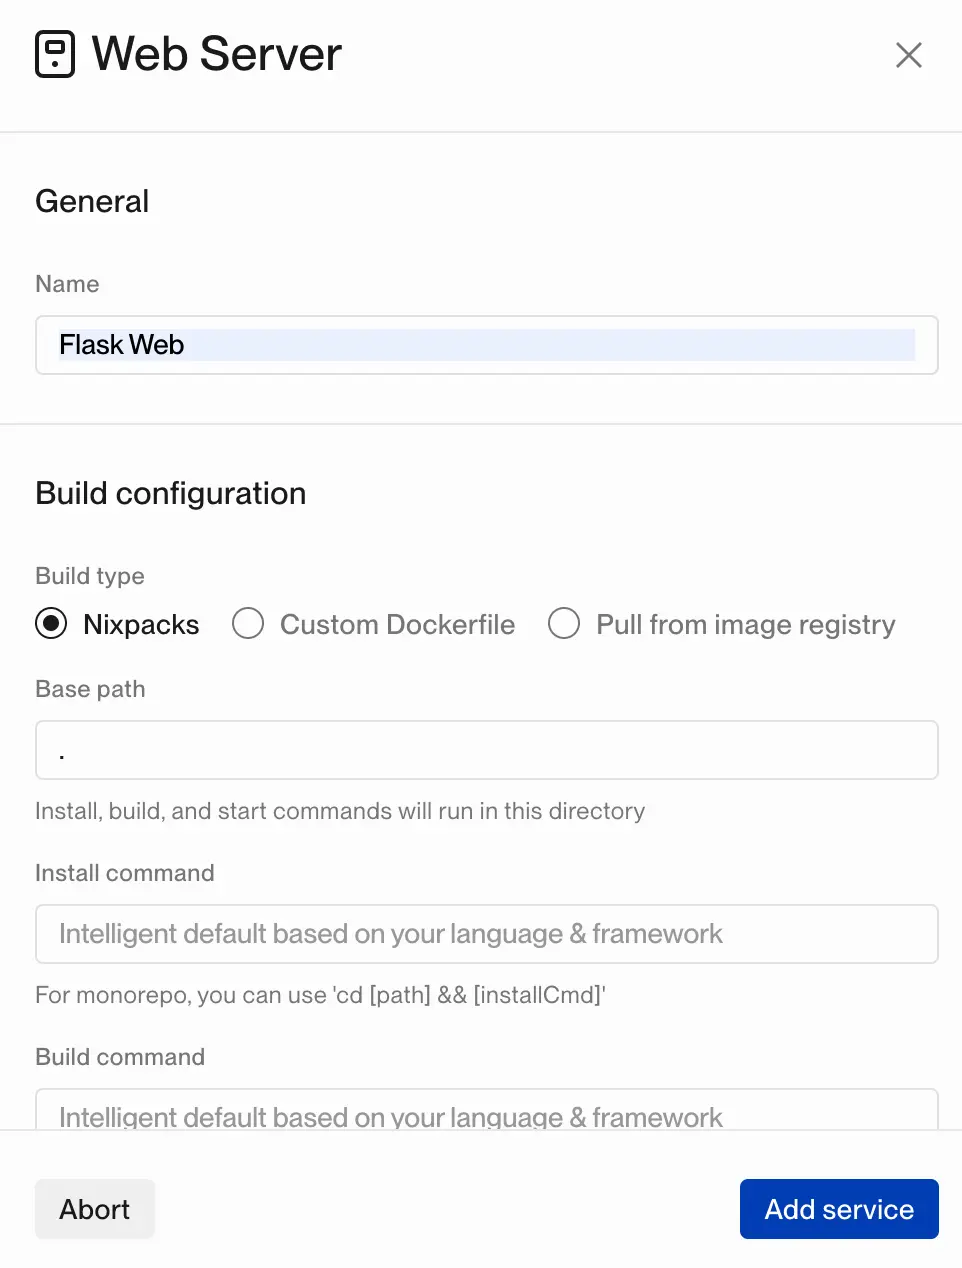
The default build type is Nixpacks, which builds your application into a Docker image for you. You do not need to provide a Dockerfile. However, if your application has any custom install, build, or start commands, this would be the place to configure them.
There are more configuration options on this screen if you continue scrolling - two of the most important are:
- Port - the default HTTP port for Flightcontrol’s web service servers is 3000 - you can change this if you need to.
- Health check URL - this is the path that ECS will use to determine if your application is healthy. The default is
/.
Click the Add service button to continue.
Deploying the Project
After adding the Flask web server service, you’ll see a screen that shows the services that are part of your project. You can add more services if you need to, such as a database or Redis, but for this guide, we’ll just use the Flask web server service.
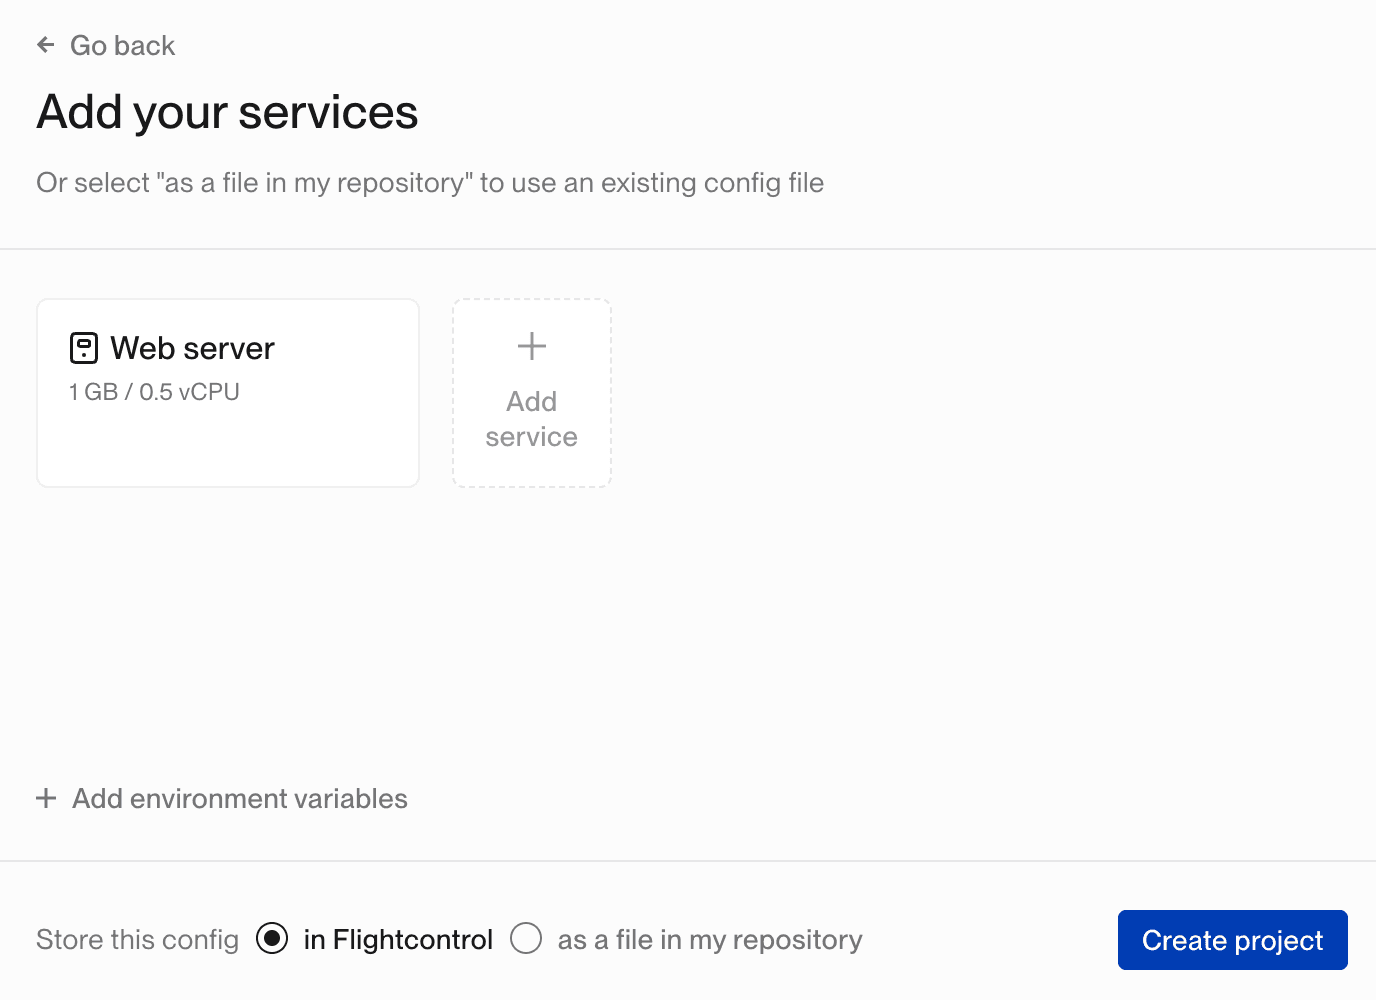
Click the Create project button to build your project, provision your AWS infrastructure, and deploy your application.
Expect this to take between 10-20 minutes for the initial setup and deployment. Subsequent deployments will be much faster.
Successful Deployment
Now is the time to visit your new Flask application in the browser. You can find the URL for your Flask application after you get a successful deployment in the Flightcontrol dashboard, and it will look similar to this:
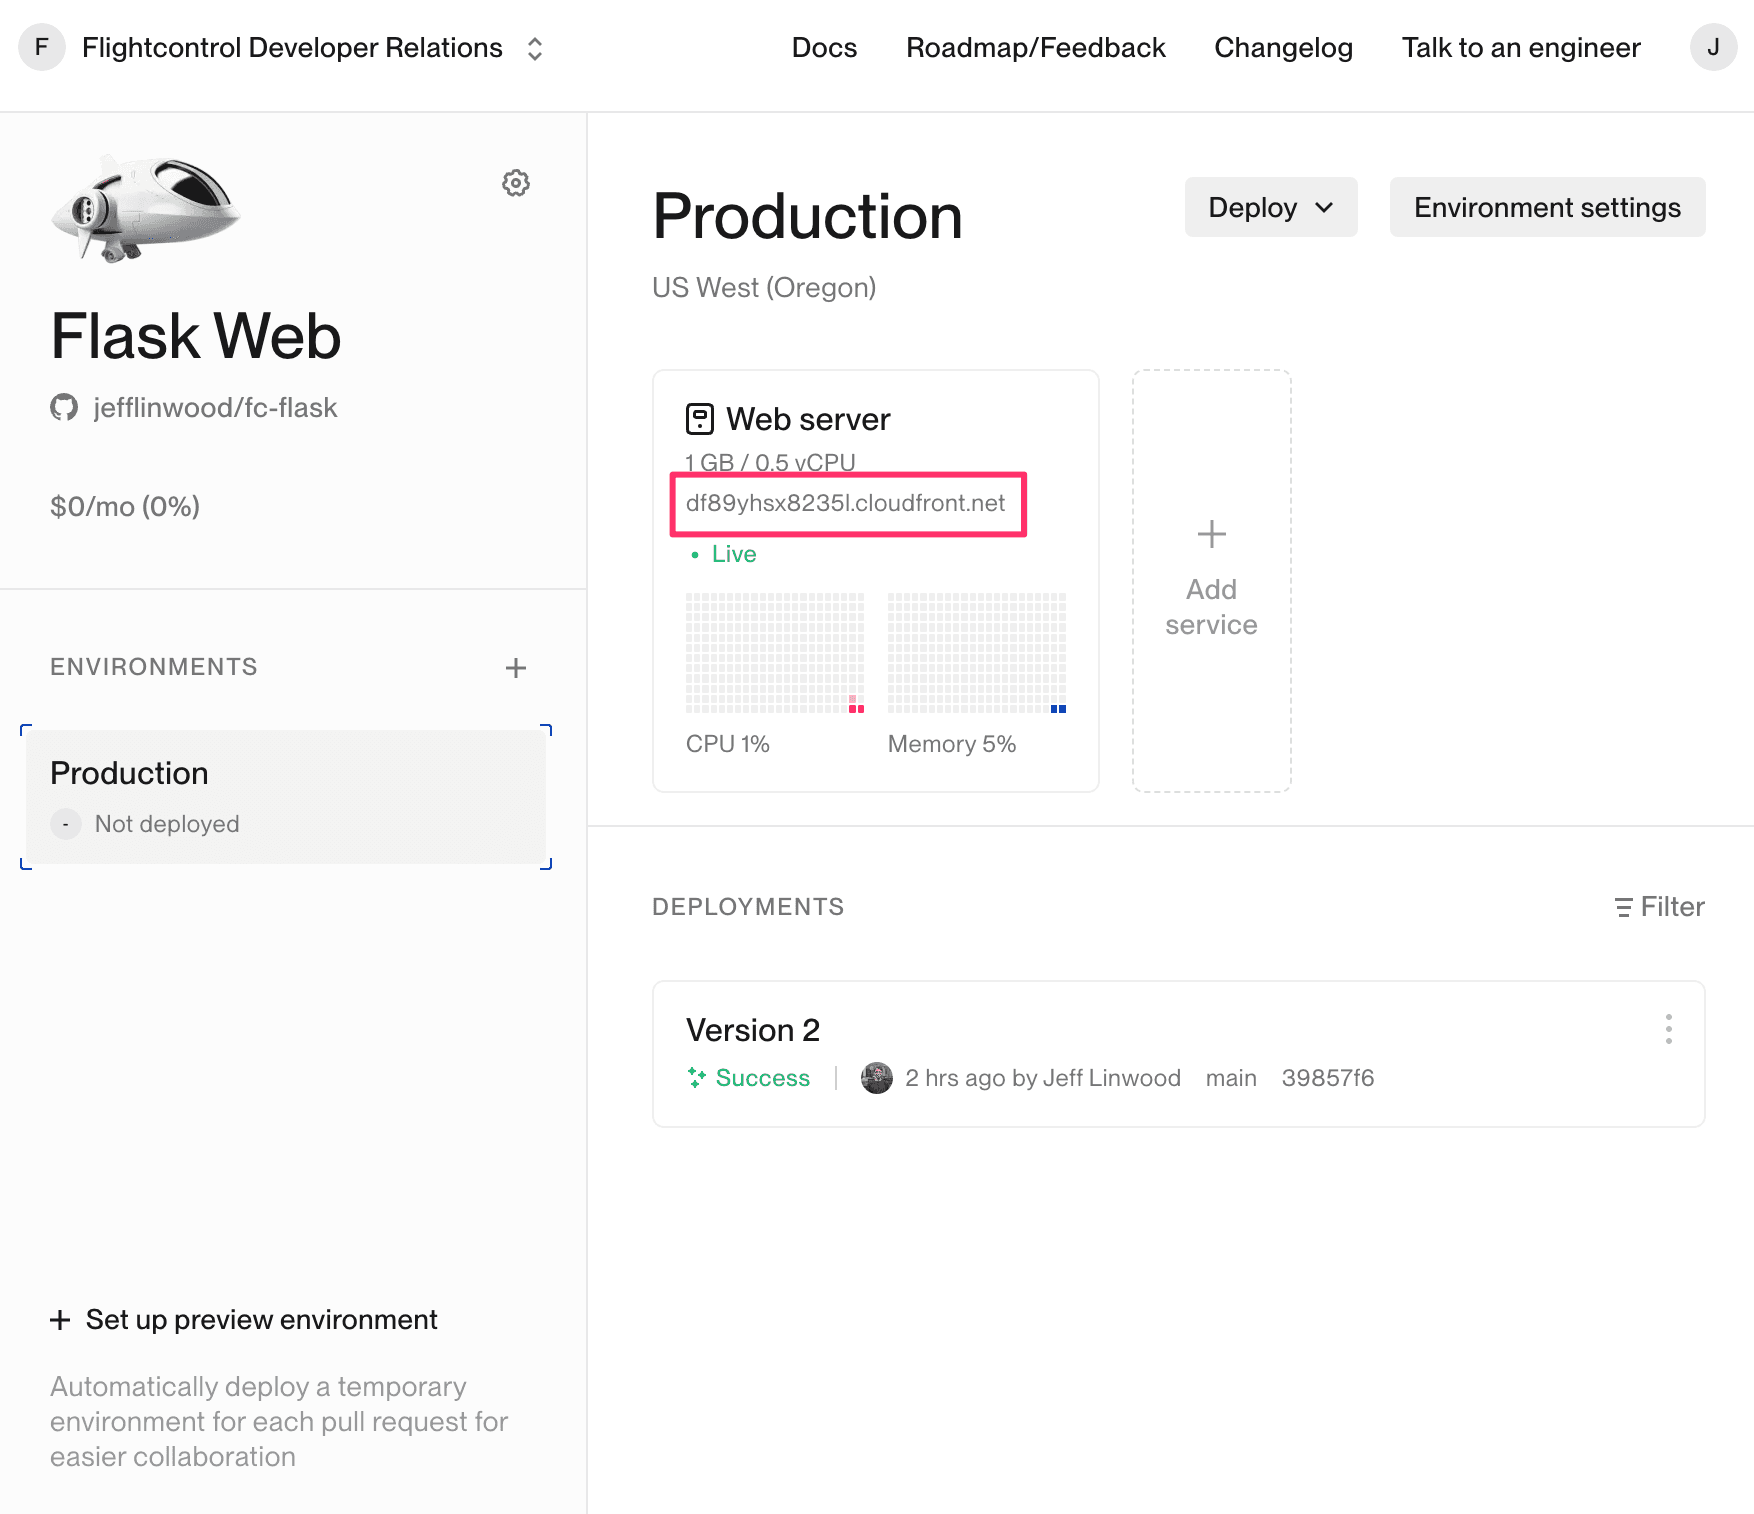
Once everything is runnning smoothly, go ahead and make a change to your Flask code and push the change to your main branch on GitHub. Flightcontrol will automatically detect the change and deploy it to your environment.
Errors with Deployment
If you run into any errors during the deployment process, you can check the build or deploy logs for the service that failed to deploy. You can find the logs by clicking on the Flightcontrol environment page.
If you’re still having troubles, reach out to us for support please get in touch with us in our Discord Channel! We’re very happy to help out.