Getting Started with Ruby on Rails on Flightcontrol
This tutorial takes you through the process of deploying a Ruby on Rails web application to Amazon Web Services (AWS) with Flightcontrol. If you don’t have a Rails application to deploy yet, you can visit our Create a Rails Application guide.
At the end of the tutorial, you will have a Rails web application running on AWS, and you will have learned how to use Flightcontrol to deploy your own Rails applications.
Important Database Note
You can’t use SQLite as your database with Flightcontrol, because it’s not supported on Amazon’s Relational Database Service (RDS). It’s a good idea to use the same database for local development and cloud deployment, so we recommend using Postgres (or MySQL or MariaDB) for both.
Using your Git repository
Flightcontrol works with Git repositories to deploy your code base.
Your repository can be either private or public for Flightcontrol to work. If you have control over the repository, Flightcontrol can listen for changes to your repository and automatically deploy your application when you push new code. Public open source repositories are also supported, but you would need to trigger manual deployments.
We will need to authorize the Flightcontrol GitHub app to access this repository before we can deploy it.
Creating a Project on Flightcontrol
If you haven’t already created a Flightcontrol account, you can do so at the Flightcontrol Dashboard.
Now that you have a Flightcontrol account, you can create a new project. Flightcontrol projects represent a single application or set of related applications that you want to deploy to AWS. Each project can have multiple environments, such as staging or production. Each environment can then have one or more services, such as a web application or a database.
To create a new project, click the Create Project button on the right hand side of the dashboard. If you don’t have any projects yet, Flightcontrol will show you the form to create one when you log in to Flightcontrol.
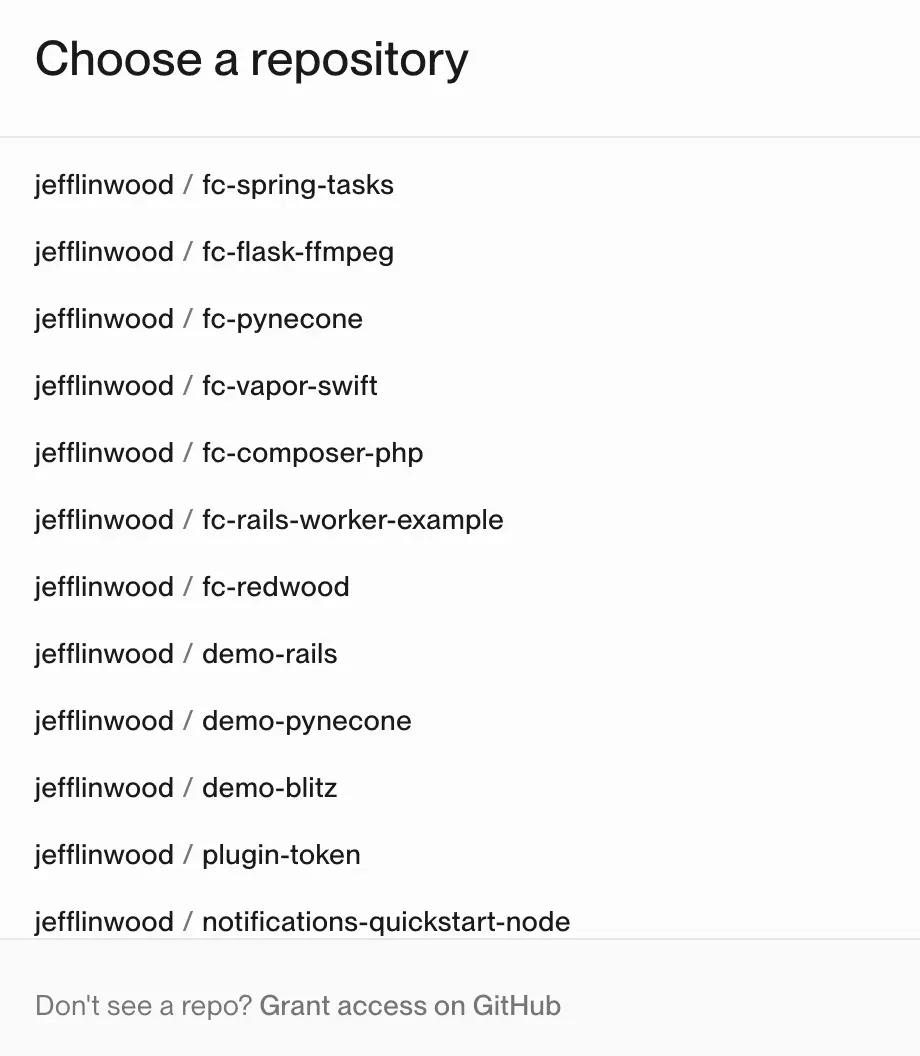
If you don’t have the GitHub repository you want to deploy in that list, click the button at the bottom of the form that takes you to the Flightcontrol GitHub app. On that web page, you can authorize specific repositories for Flightcontrol to access.
If you haven’t connected your Flightcontrol account to GitHub yet, let’s do that now.
Follow our guide on Connecting Flightcontrol to GitHub to walk you through the necessary steps.
Configure your Project
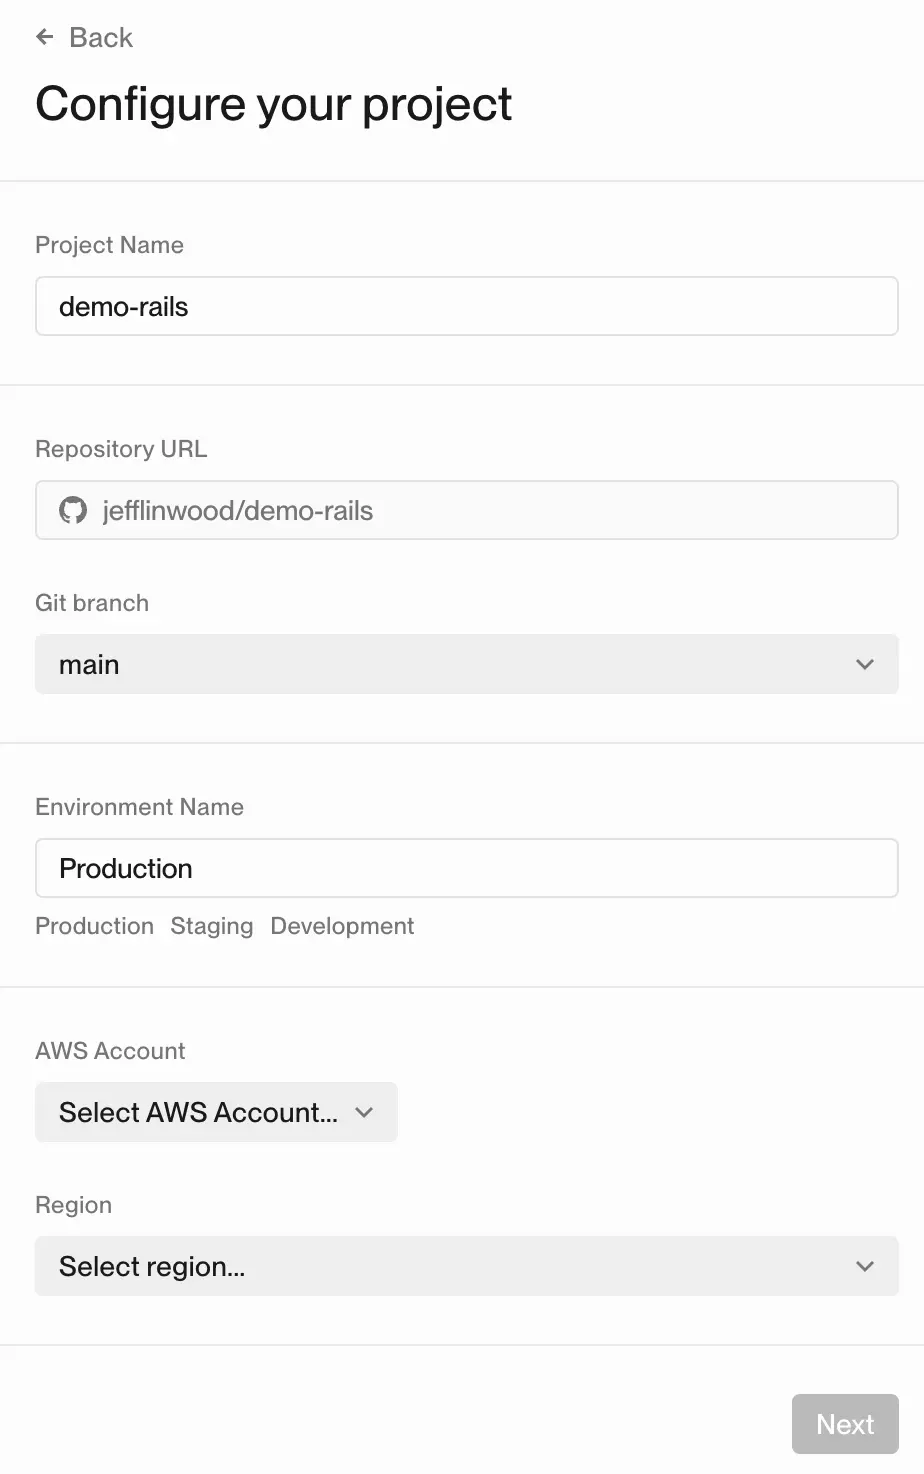
The next screen configures the project level settings for your application.
You have the choice of using the dashboard for an interactive configuration, or using a flightcontrol.json file for an infrastructure-as-code configuration.
We’re going to use the dashboard in this tutorial.
When it comes to an environment - you can choose to use the environment name that makes sense for your project deployment.
For this tutorial, we’ll choose “Production”.
You will need to choose an AWS account for the project, as well as an AWS region to deploy to (such as us-west-1).
Click the Next button to continue.
Using the Rails Preset for your Project
Flightcontrol offers a number of presets for common application types. These presets are designed to get you up and running quickly with a working deployment.
The Rails preset will set up a Postgres database and a web server for your Rails application. You can always add more services later, but this will get you started. For instance, you can find our guide about how to deploy Sidekiq workers with Flightcontrol.
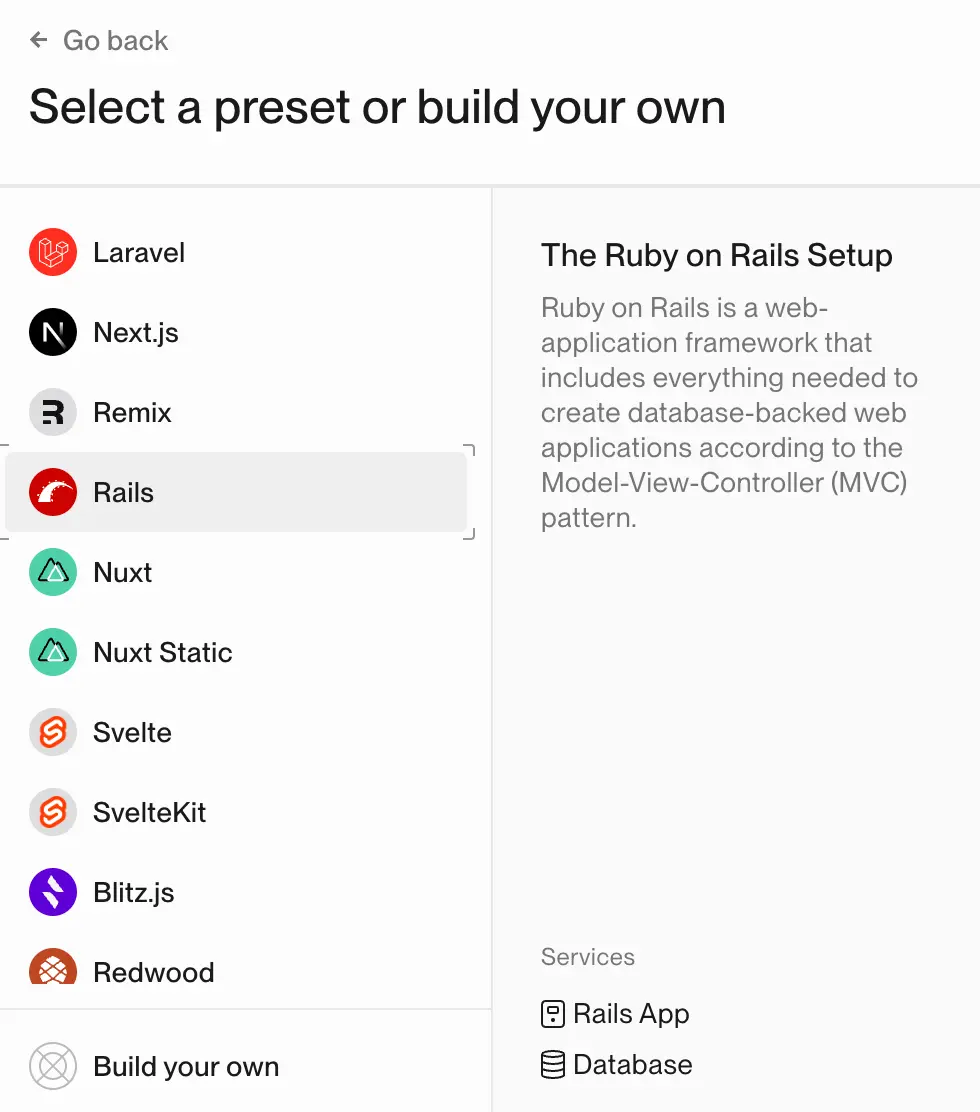
You do have the option of configuring your own services, but for this tutorial, we’ll use the Rails preset. On the next screen, we’ll see more about what the Rails preset sets up for you.
Click the Rails item in the list of presets to go to see the services Flightcontrol will create.
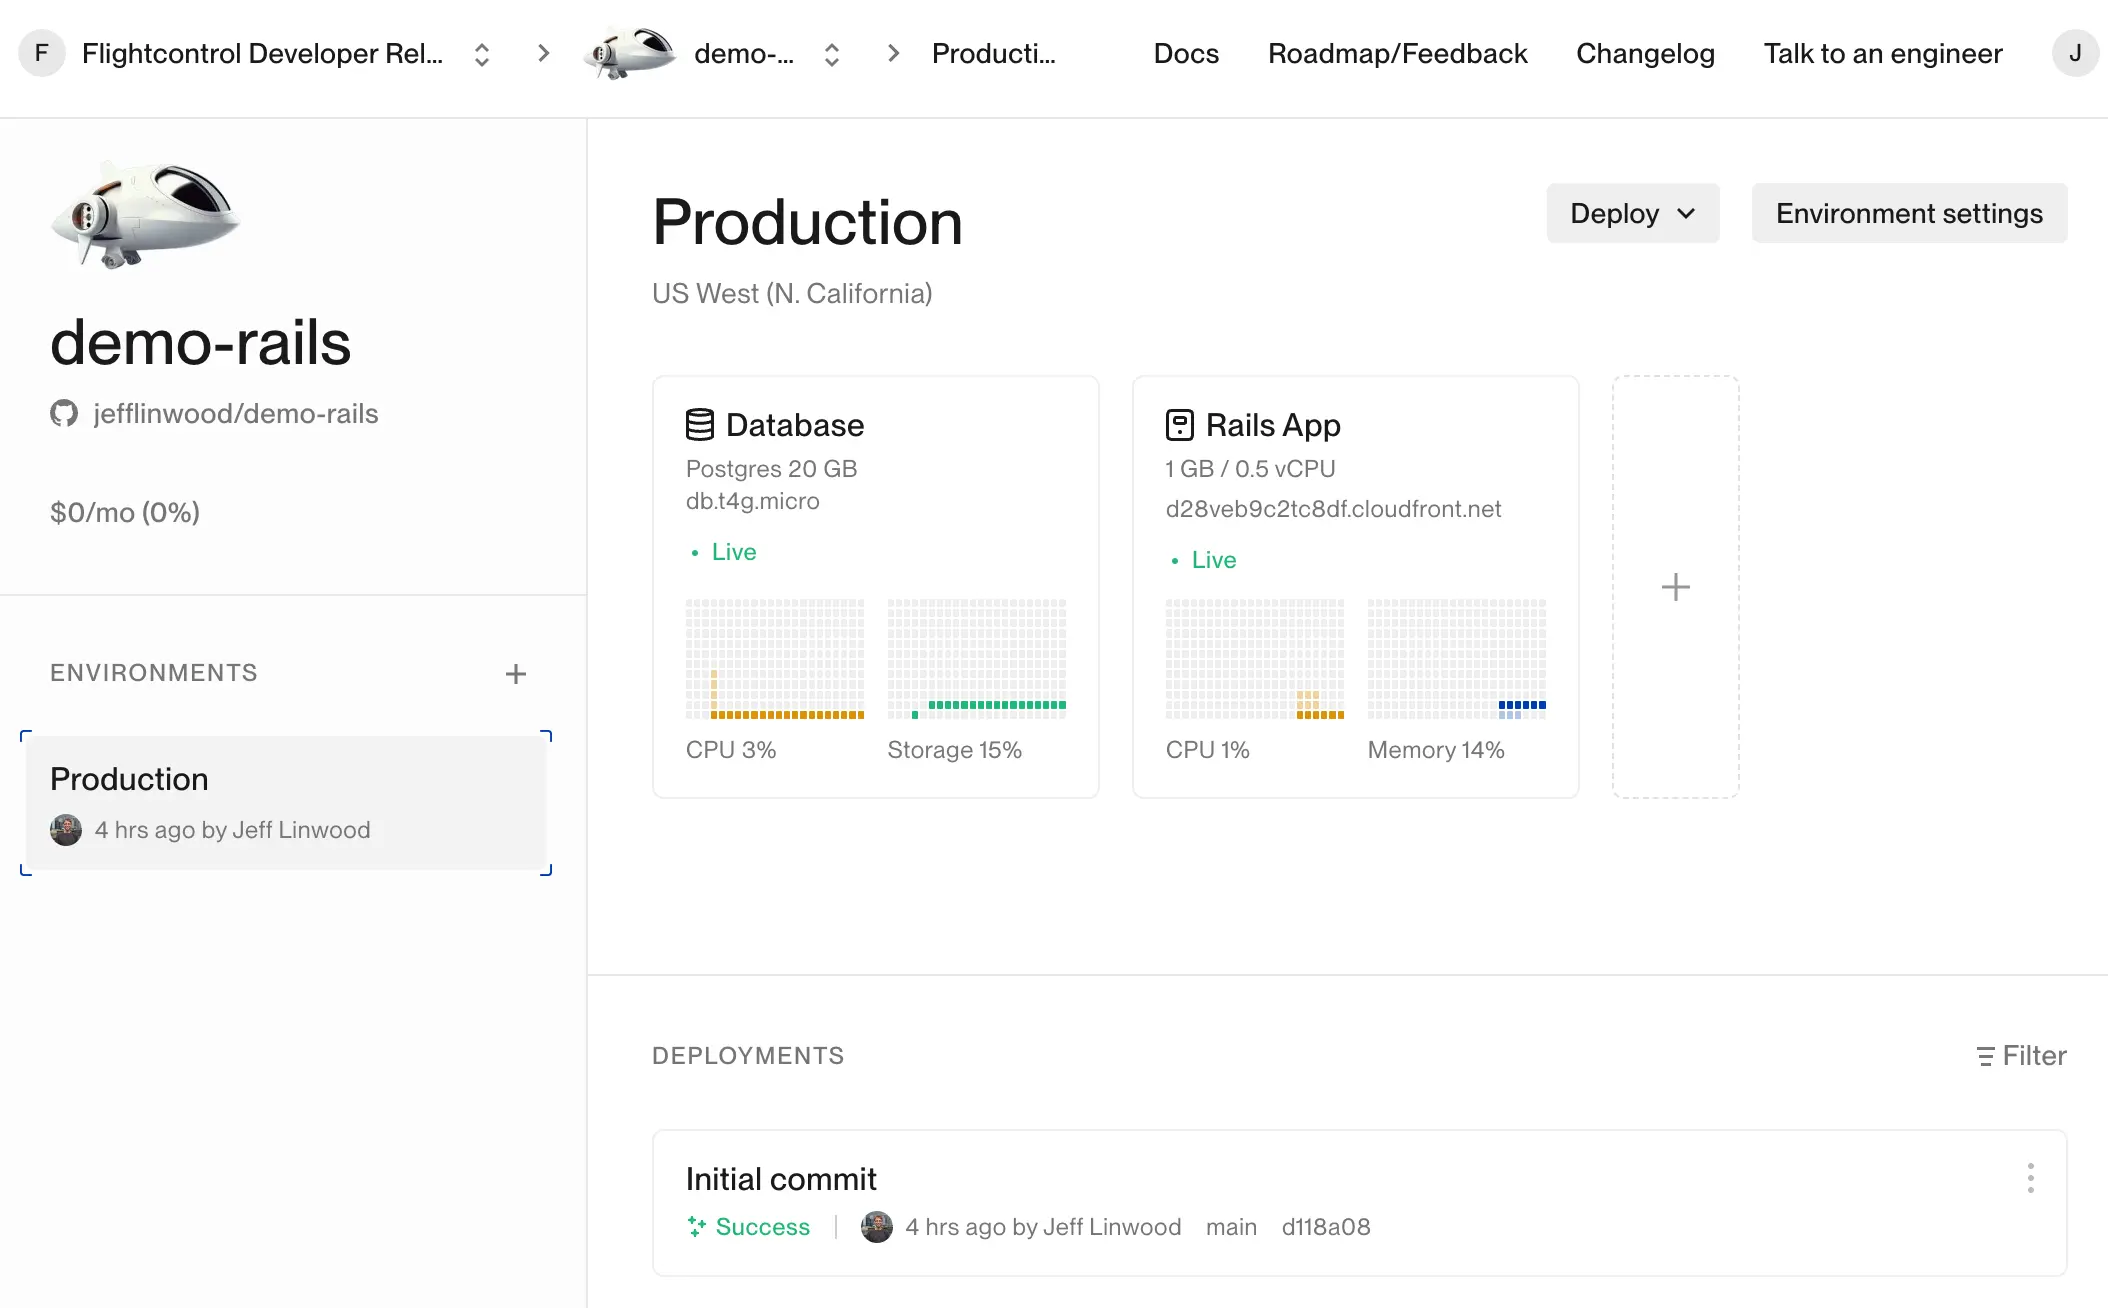
Reviewing your Flightcontrol Services
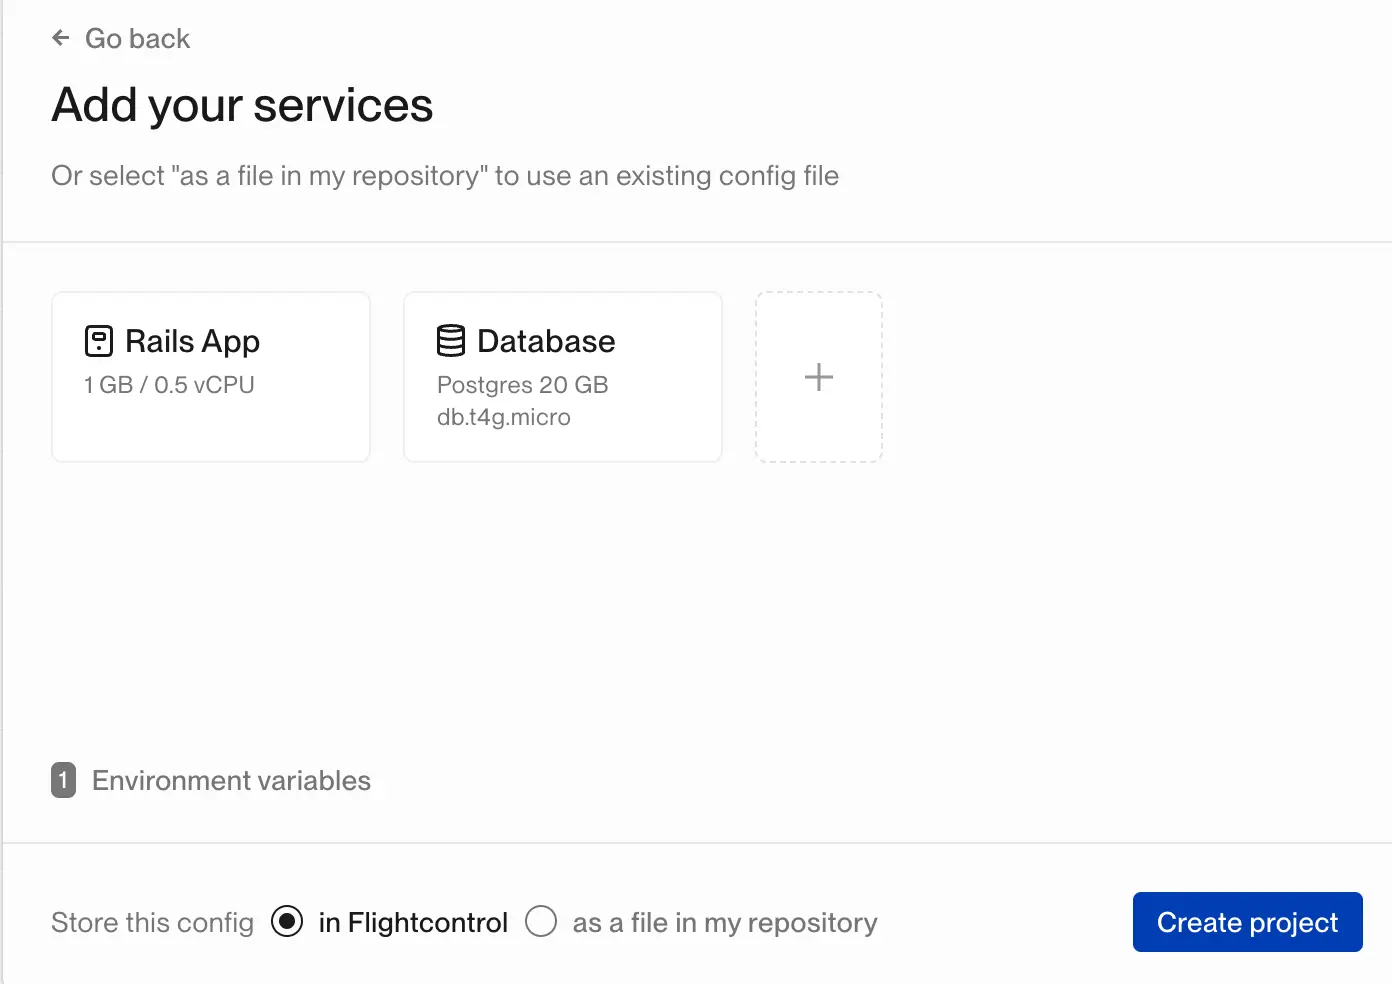
Our Rails application is pretty simple - we only need a web server and a database. You can see that the Rails preset has set up both of these services for us.
You can click into each of the services to see the configuration options, or to use MySQL instead of Postgres, for instance. You can also modify the default instance sizes for each service, in case you need more or less capacity.
Flightcontrol will automatically set up the database URL for you. The Nixpacks build system Flightcontrol uses will also build your Rails application.
There is one setting in the Rails App web server service that you may need to change. The build command Flightcontrol uses (after running bundle install automatically) is:
bundle exec rails db:migrate && bundle exec rake assets:precompileIf your project has a different build command, you can change it in the “Rails App” service.
The last step for a successful Rails deployment is to set up the environment variables.
These environment variables are for an entire Flightcontrol environment, so they are shared between the database service and the web server service.
Environment Variables
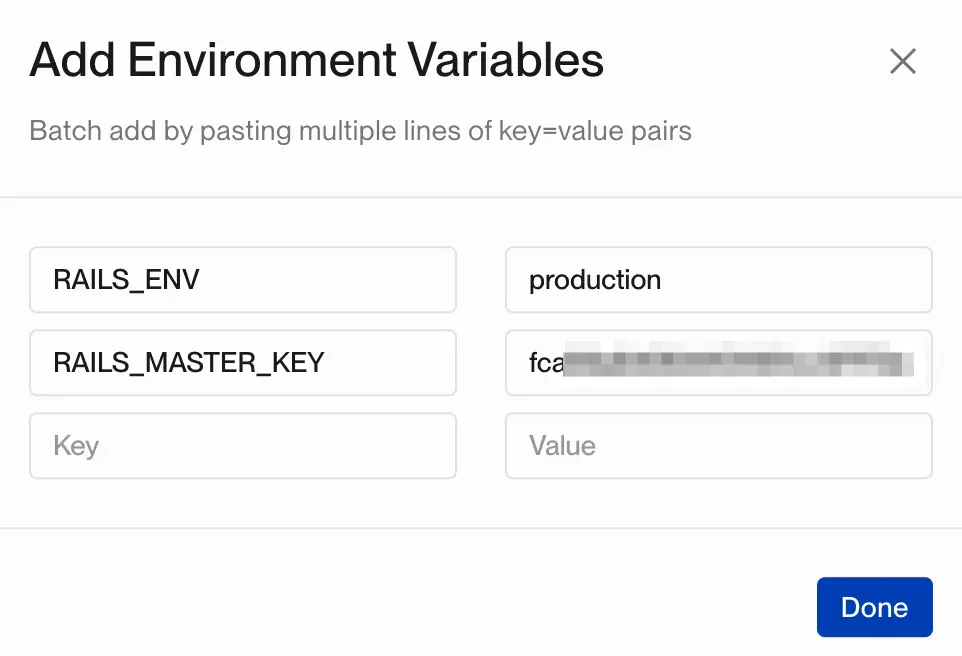
Your Rails application needs at least two environment variables to run properly:
RAILS_MASTER_KEY- Every Rails application will have a different master key for encrypting secrets.RAILS_ENV- This should be set toproductionfor your Rails site to work on AWS. If you’ve set up other environments in yourconfig/environmentsfile such asstaging, you could use those.
You can find the Environment variables button below the Flightcontrol services. By default the Rails preset will add one environment variable for you, RAILS_ENV, and set it to production. You will need to add RAILS_MASTER_KEY manually.
There is one special case if you are running MySQL as your database. See the Database URL section below for more details.
Rails Master Key
When you create a new Rails application, the rails tool will generate a config/master.key file for you. The contents of this file are used to encrypt secrets in your config/credentials.yml.enc file. The config/master.key file is not (and should not be) checked into source control (due to a rule in the .gitignore file), and you will need to provide the value stored in this file to Flightcontrol as an environment variable. This would hold true for any production deployment for your Rails application.
Rails Environment
You will need to manually set the RAILS_ENV environment variable to production for your Rails application to work properly with Flightcontrol.
Database URL
In most cases (Postgres and MariaDB), Flightcontrol will automatically set the DATABASE_URL environment variable for you.
However, if you are using a MySQL database, you will need to set the DATABASE_URL environment variable manually. The reason for this is that the URL provided by RDS is in the format mysql://, and Rails expects the URL to be in the format mysql2://. Rails uses the first part of the URL, the scheme, to determine which database adapter to use. The mysql2 adapter is the one that Rails uses for MySQL databases.
You will need to copy the value of the database URL from AWS Parameter Store, and then add 2 to the scheme at the beginning of the URL. For example, if the database URL is mysql://, you will need to change it to mysql2://.
Creating the Project and First Deployment
Once you have the environment variables set up, you can click the Create Project button to create the project. Flightcontrol will provision the required infrastructure in your AWS account, build your Rails application, and deploy it to AWS.
If all goes well, Flightcontrol will deploy the web and database services to AWS, and you will have a functioning Rails application on a publicly accessible URL!
This process can take between 10-20 minutes to finish the initial deployment.
Subsequent deployments are much faster. You can try this out by making a change to your Rails application and pushing it to GitHub. Flightcontrol will automatically detect the change on your main branch and deploy it to your environment.
Errors with Deployment
If you run into any errors during the deployment process, you can check the build or deploy logs for the service that failed to deploy. You can find the logs by clicking on the Flightcontrol environment page.
The most common error you will see is that the health check failed. Double check that these configuration options are all in place:
- RAILS_ENV set to
production - RAILS_MASTER_KEY set to the value of your Rails application’s master key - in the
config/master.keyfile - Web Server Service build command set to
bundle exec rails db:migrate && bundle exec rake assets:precompile
If you’re still having troubles, reach out to us for support please get in touch with us in our Discord Channel! We’re very happy to help, and to get you up and running on Flightcontrol.