Integrating with Datadog
Datadog is a cloud monitoring platform you can use to provide observability for your Flightcontrol services.
AWS integration is part of Datadog, and you will need to follow these directions to get Datadog and AWS working together.
- Sign up for Datadog
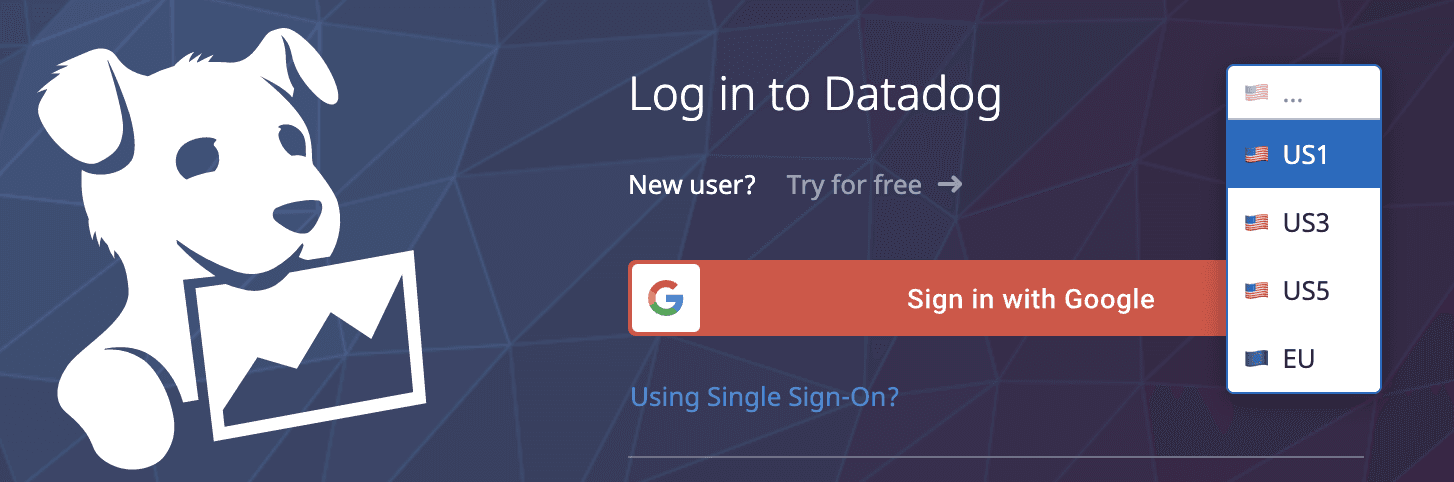
- Note the “region” you select (Example: us1, us2, etc.)
- Open the Account settings
- NOTE - You’ll need to select the region you are using from the dropdown at top right
- Create a new API key for AWS integration
- Copy the API key
- NOTE - You’ll need to select the region you are using from the dropdown at top right
- Go to
/account/settings#integrations/amazon-web-servicesin Datadog- Under Configuration, click Automatically Using CloudFormation,
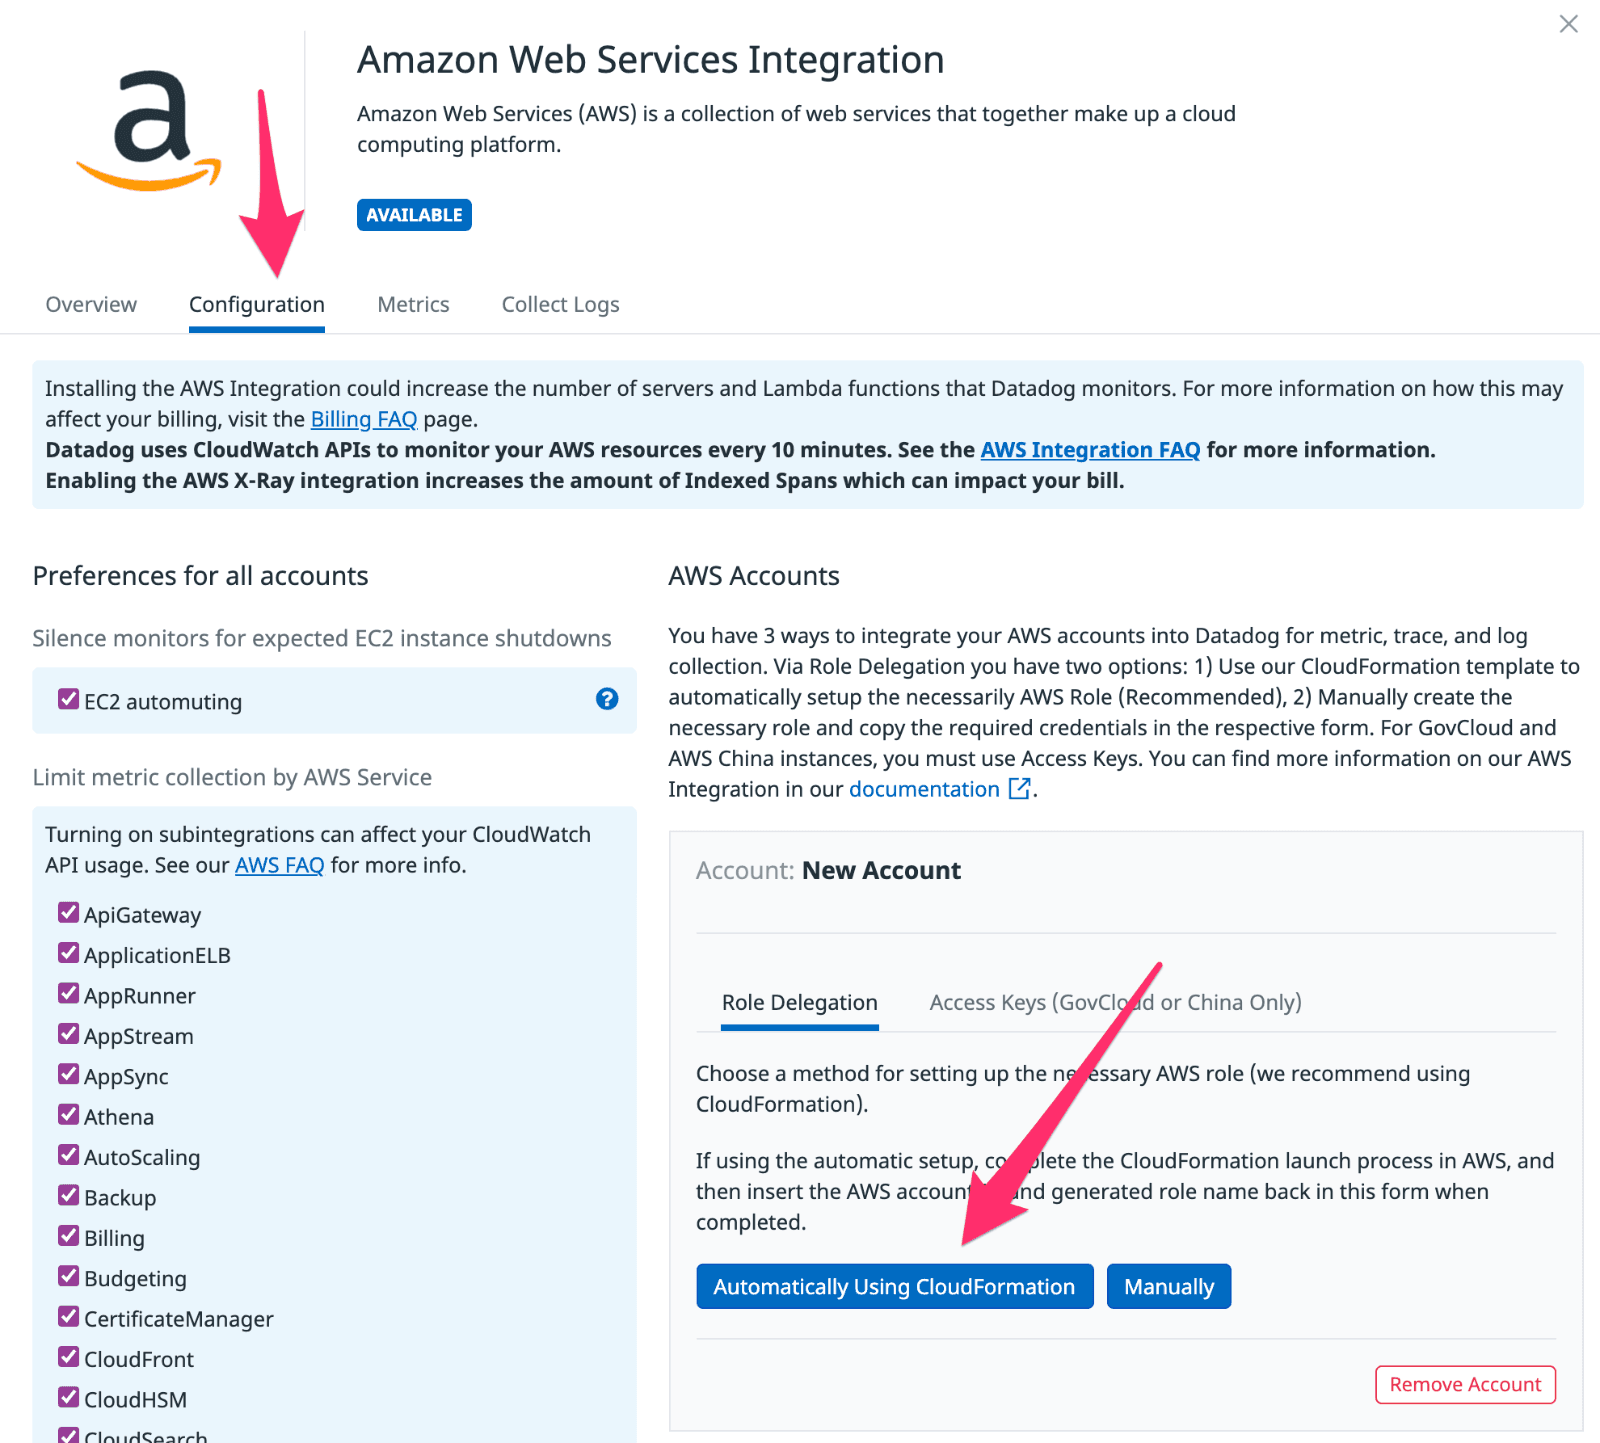
- Under Configuration, click Automatically Using CloudFormation,
- Paste the API key in the
DdApiKeyfield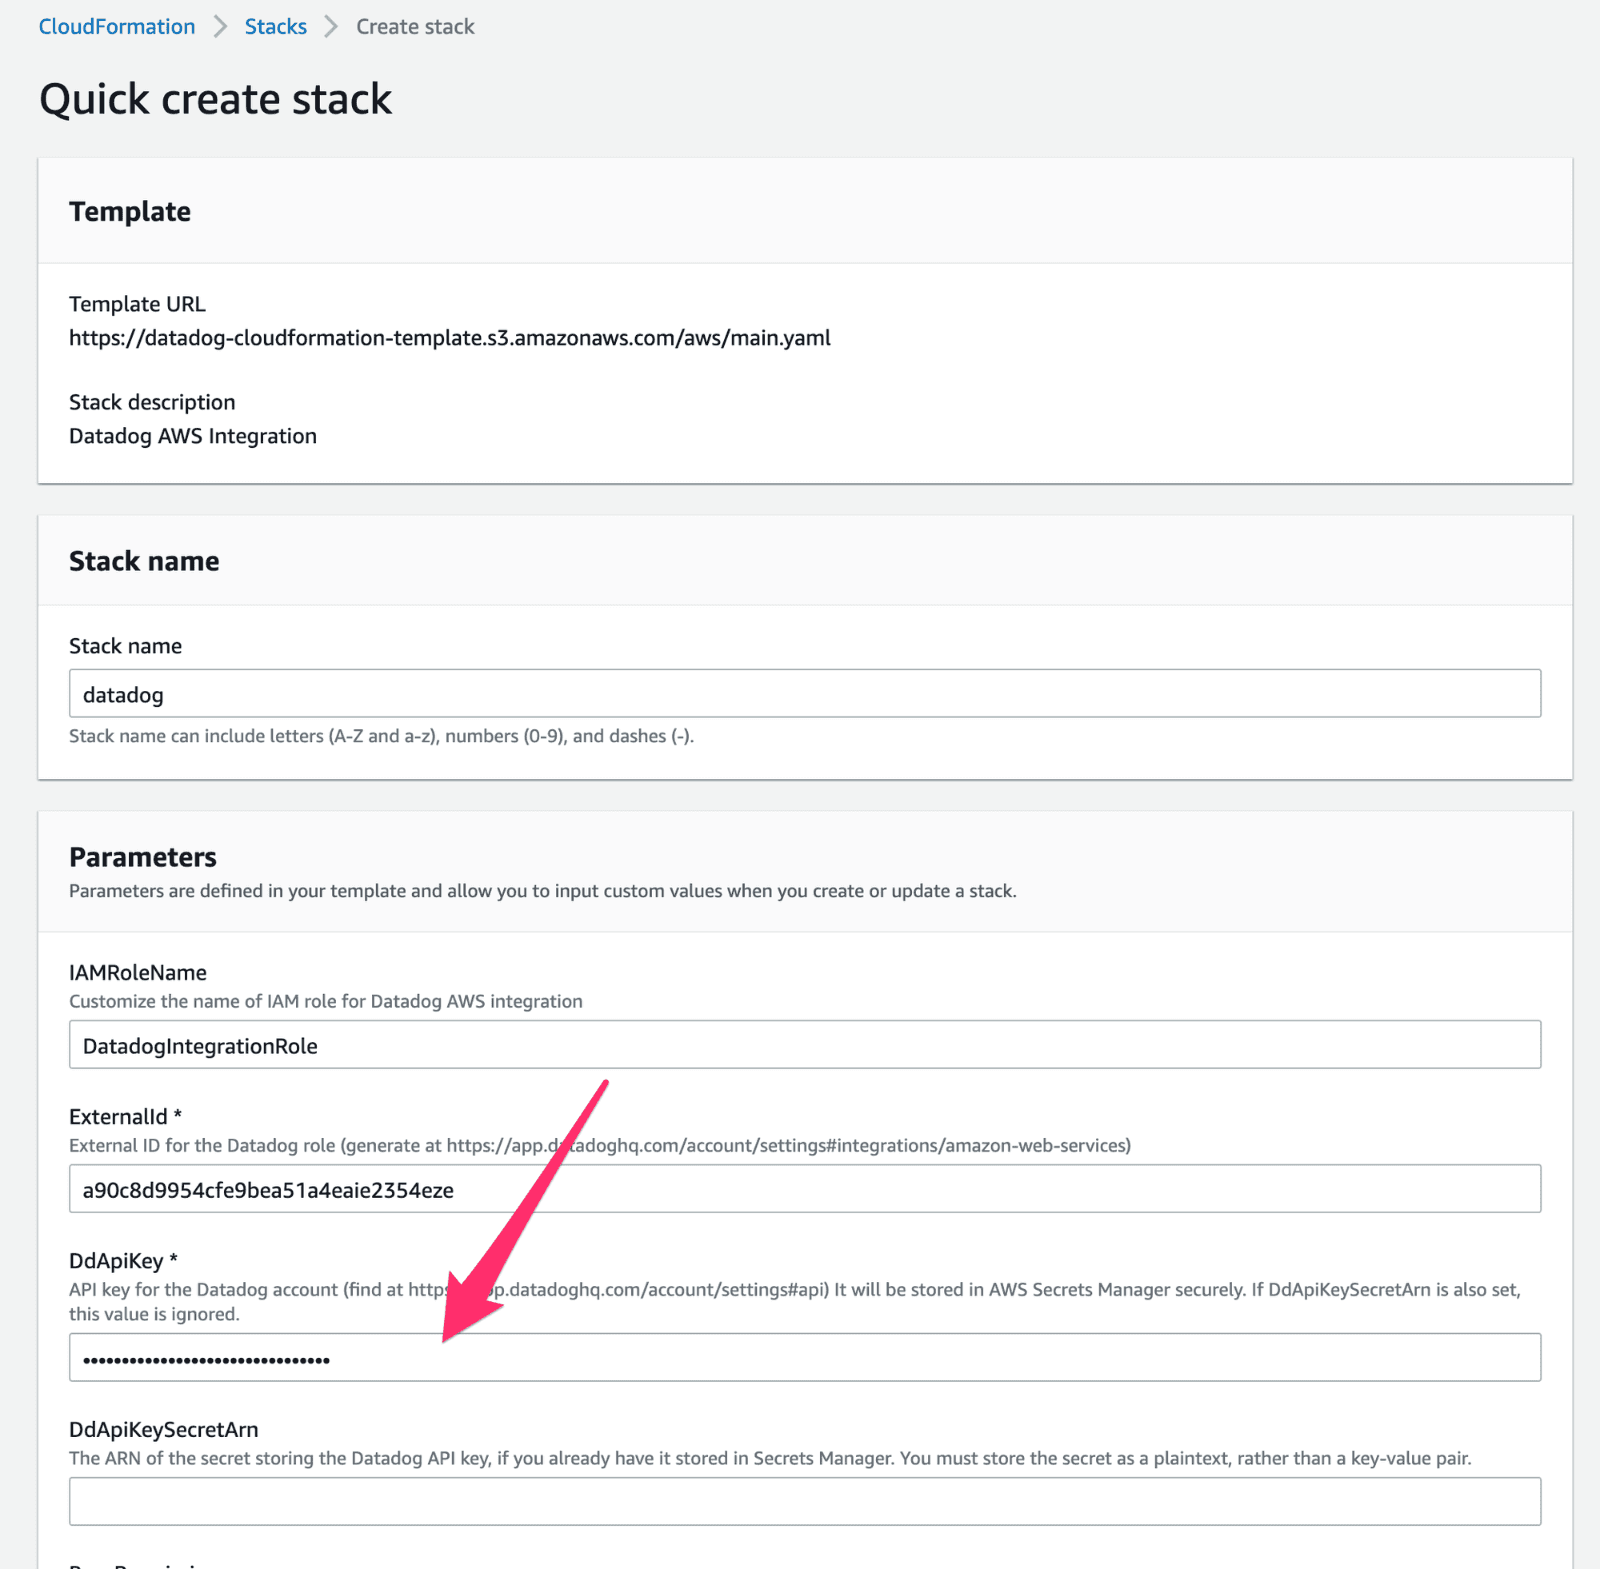
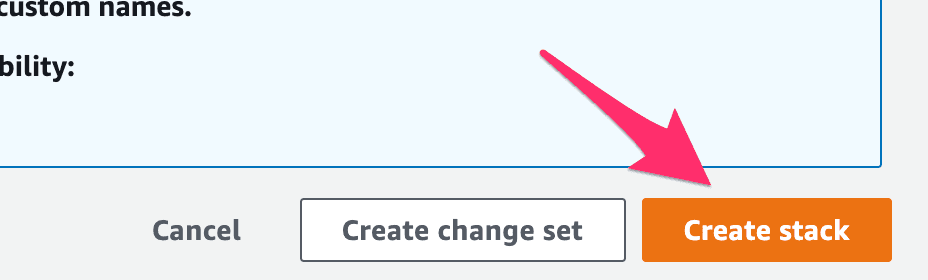
- Click Create Stack
- Back in Datadog, paste in the following:
- AWS account ID (accessible in AWS from the top right menu)
- AWS role name (
DatadogIntegrationRoleunless you changed it)
- Wait until the Datadog CloudFormation stack has completed
- If the Forwarder stack fails with error like this, you’ll need to request an increase of your Lambda Concurrency Limit (see instructions at the bottom of this page)
Specified ReservedConcurrentExecutions for function decreases account's UnreservedConcurrentExecution below its minimum value of [50]
- If the Forwarder stack fails with error like this, you’ll need to request an increase of your Lambda Concurrency Limit (see instructions at the bottom of this page)
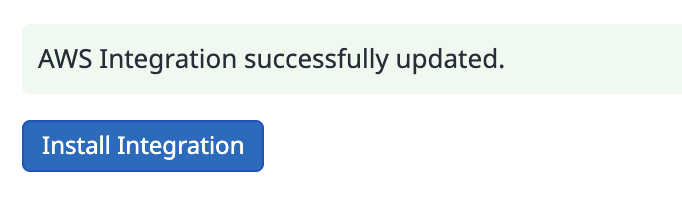
- Click Install Integration, then you should see a success message
- You should now see some infrastructure under the Infrastructure menu item.
To Set Up Log Forwarding
Log forwarding to Datadog requires the datadog-forwarder stack to be created in every region you want to forward logs from. The default aws datadog integration automatically installs it in us-east-1. See instructions below for installing it in a new region.
How to Install datadog-forwarder in a new region
-
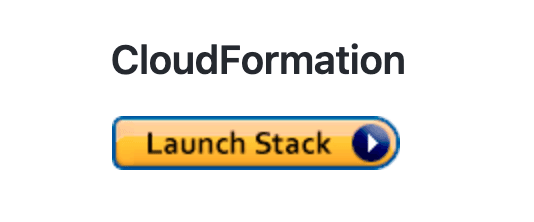
Click on the CloudFormation stack link, then click Launch Stack
-
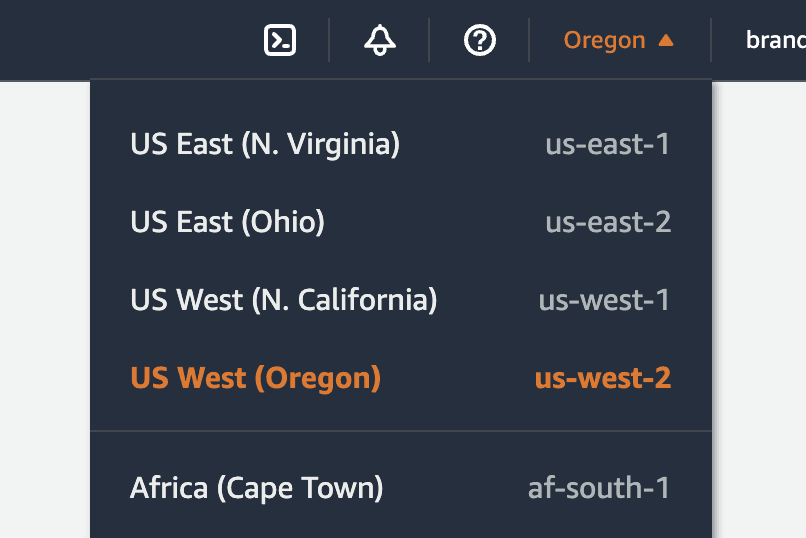
Change the AWS region to your desired region, using the AWS menu
-
In the CloudFormation create stack screen, make sure you:
- Set
DdApiKeyto your api key (visible on https://us5.datadoghq.com/logs/onboarding/cloud) - Set
DdSiteto your account url (example:us5.datadoghq.com)
- Set
-
Click the orange Create Stack button.
How to set up automatic forwarding of some services
-
Go to the Datadog Account Settings (remember you’ll need to select your datadog region from the little dropdown)
-
Click on Collect Logs tab
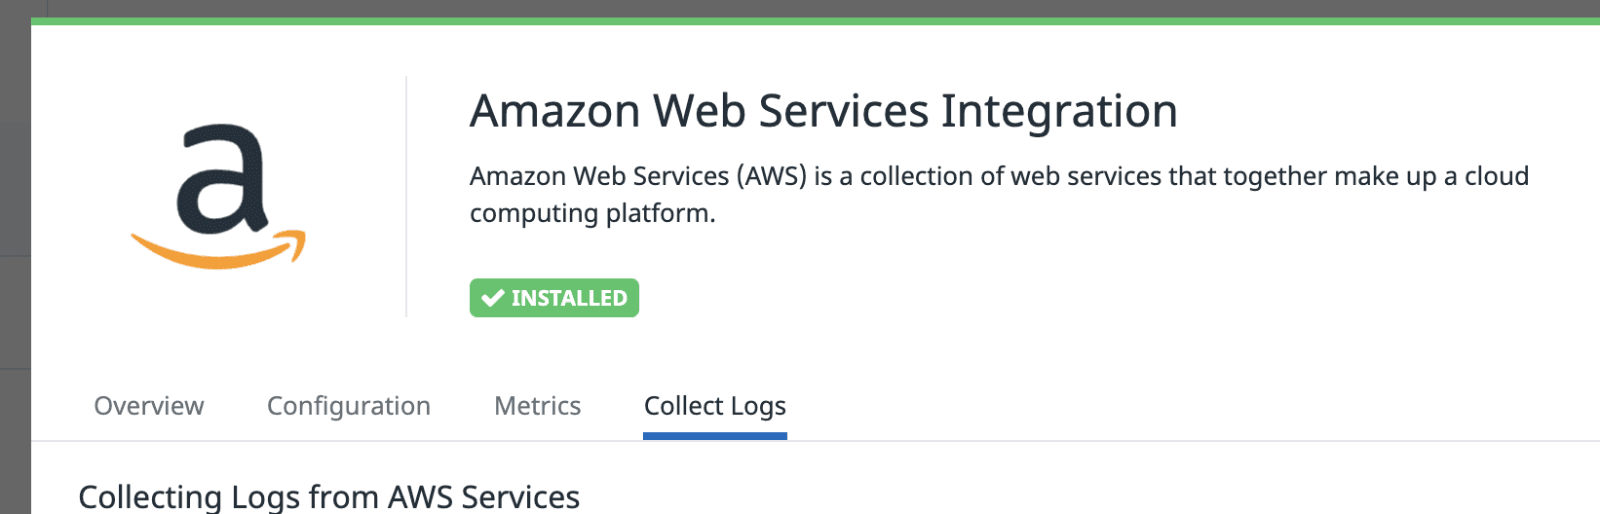
-
Inside AWS, find the ARN value of the datadog-forwarder lambda function and paste that into this Datadog form.

-
Select all the services you’d like to receive logs from, then click Save
For more details on setting up log triggers, see Send AWS services logs with the datadog lambda function.
How to set up log forwarding for ECS logs
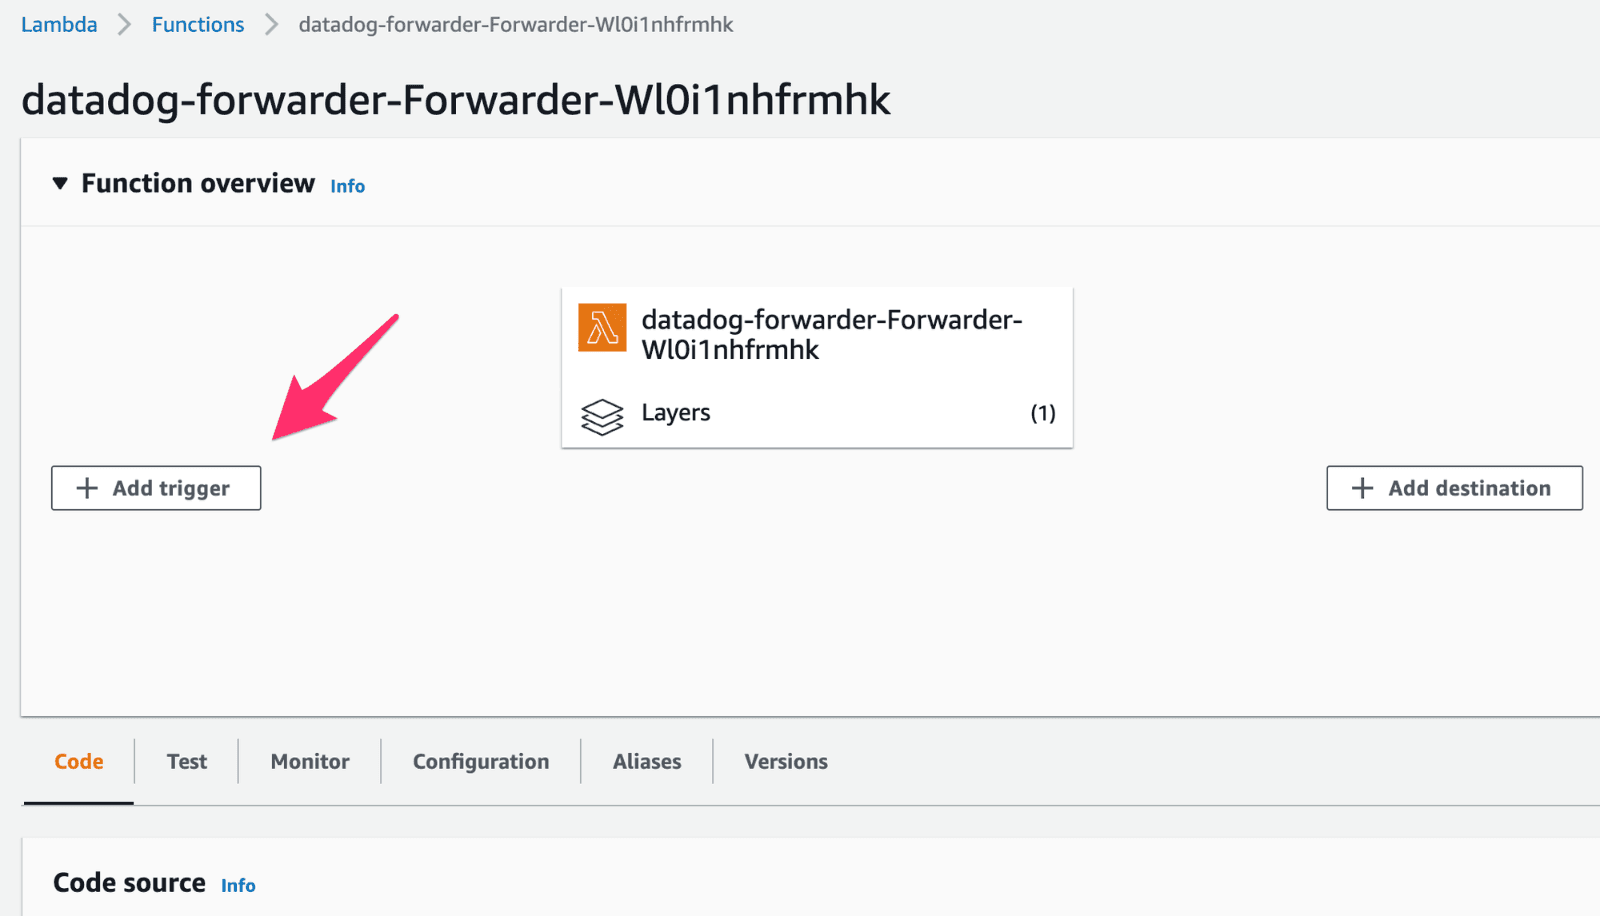
- Find the datadog-forwarder lambda in the region you want
- Click Add trigger
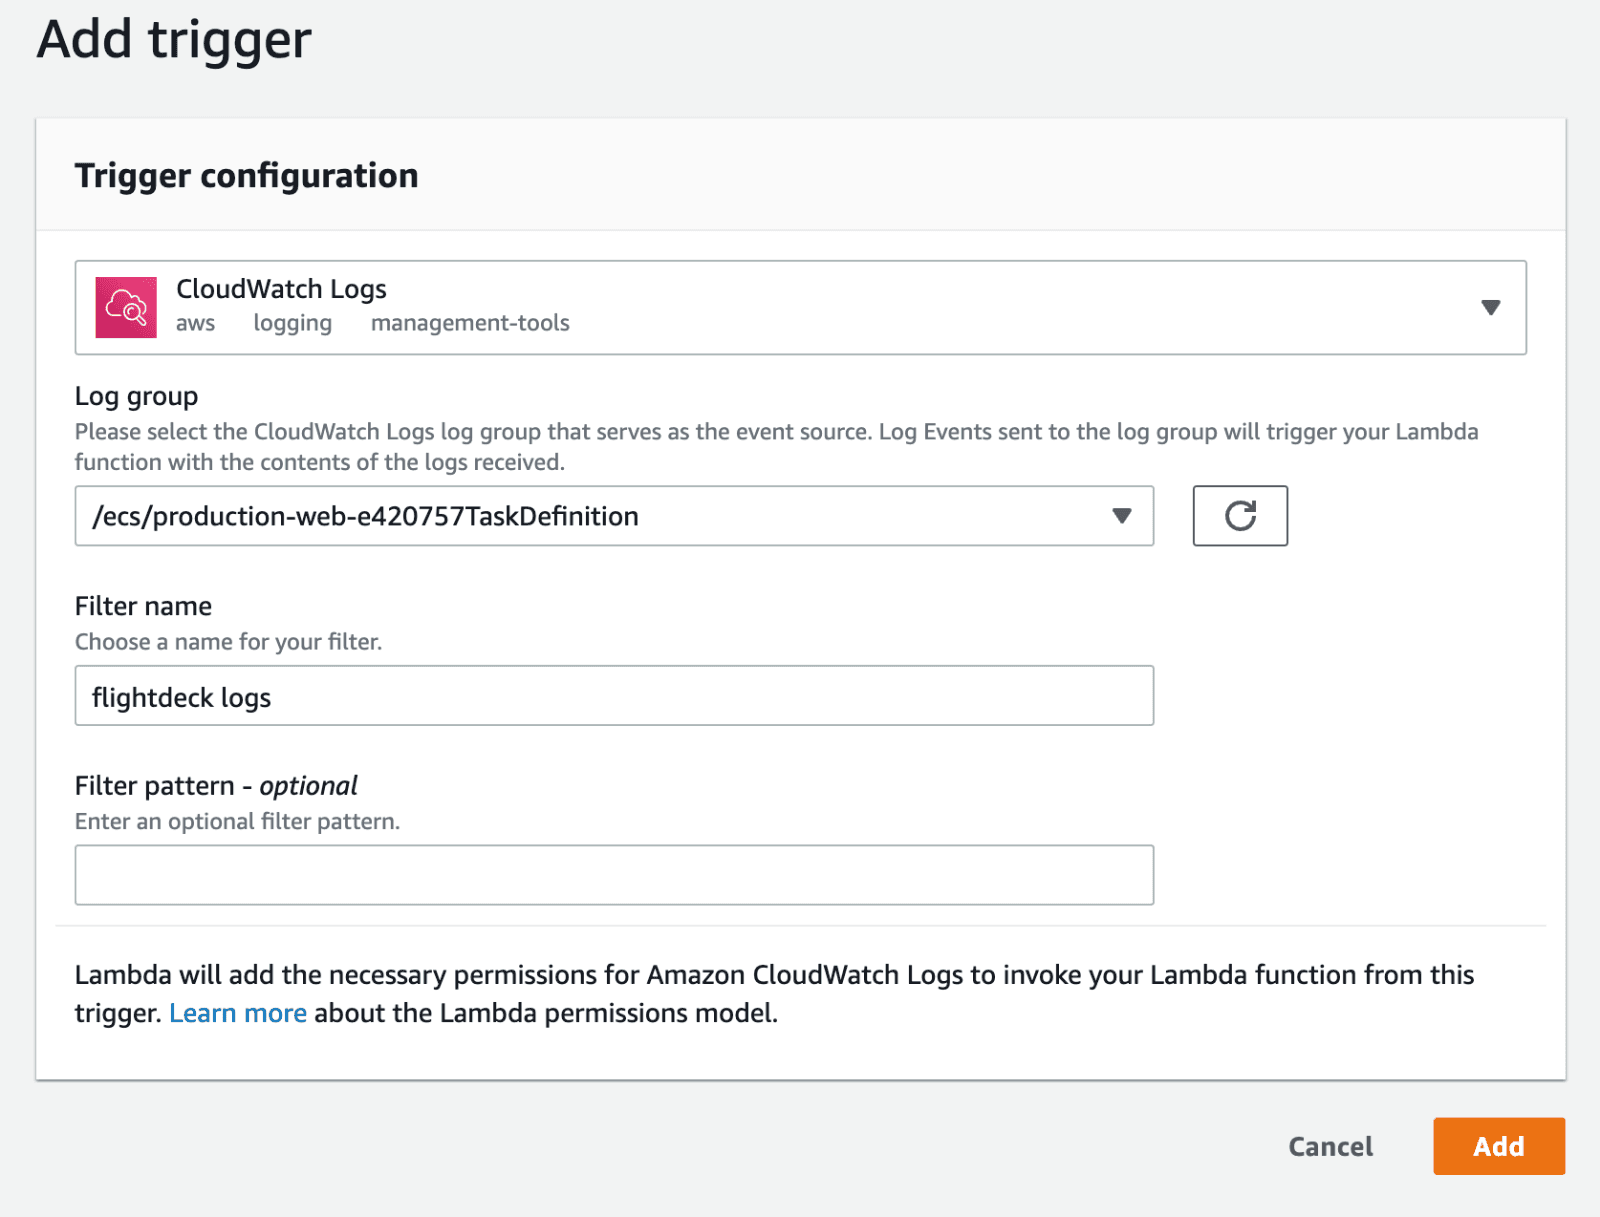
- Click Select Trigger and select CloudWatch Logs
- Click log group and find the log group for your ECS service in format
/ecs/<service-id>-randomeTaskDefinition - Enter a name to remember this by in “filter name”
- Click Add
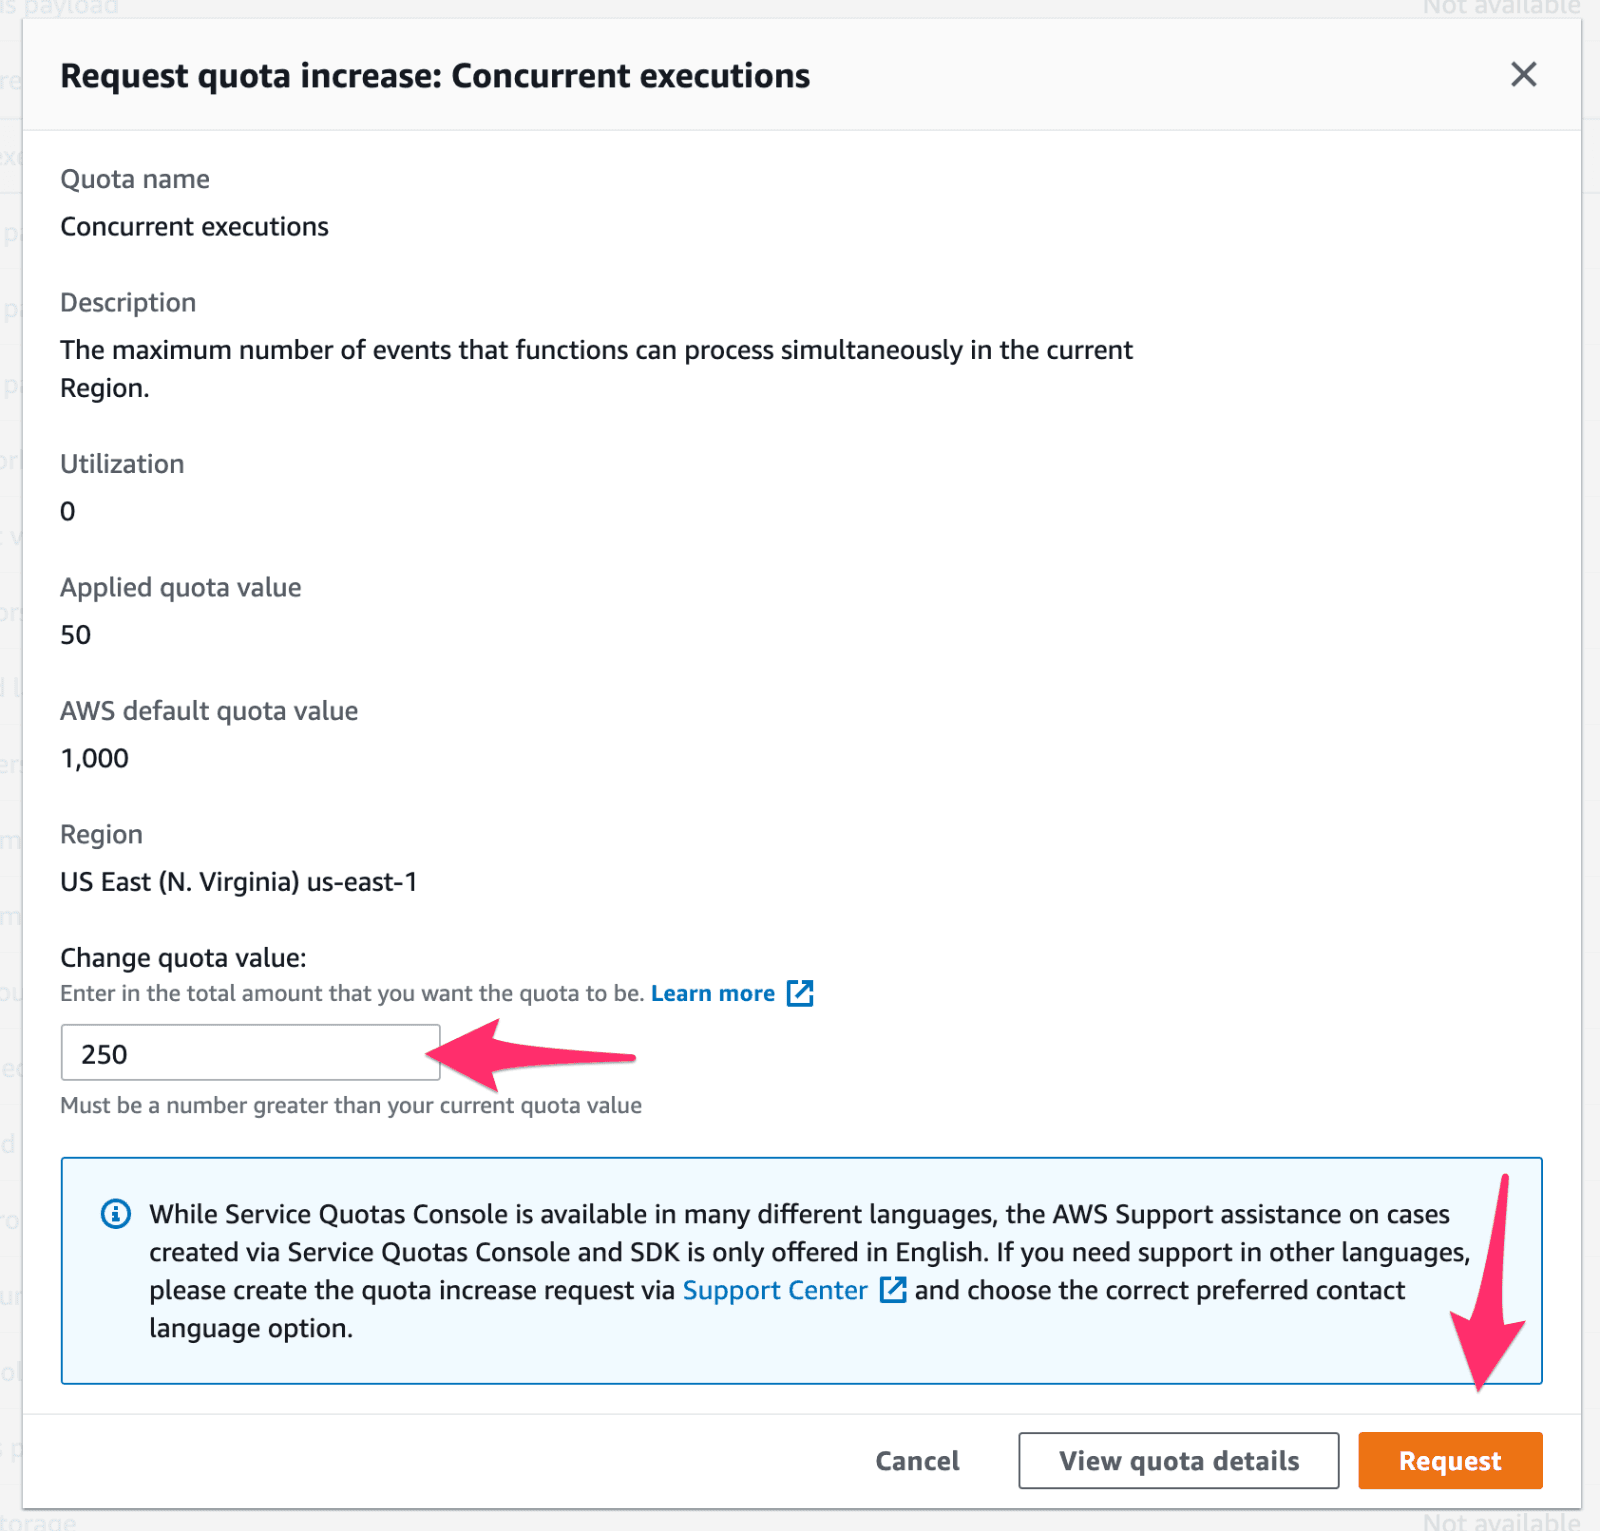
To Increase Lambda Concurrency Limit
-
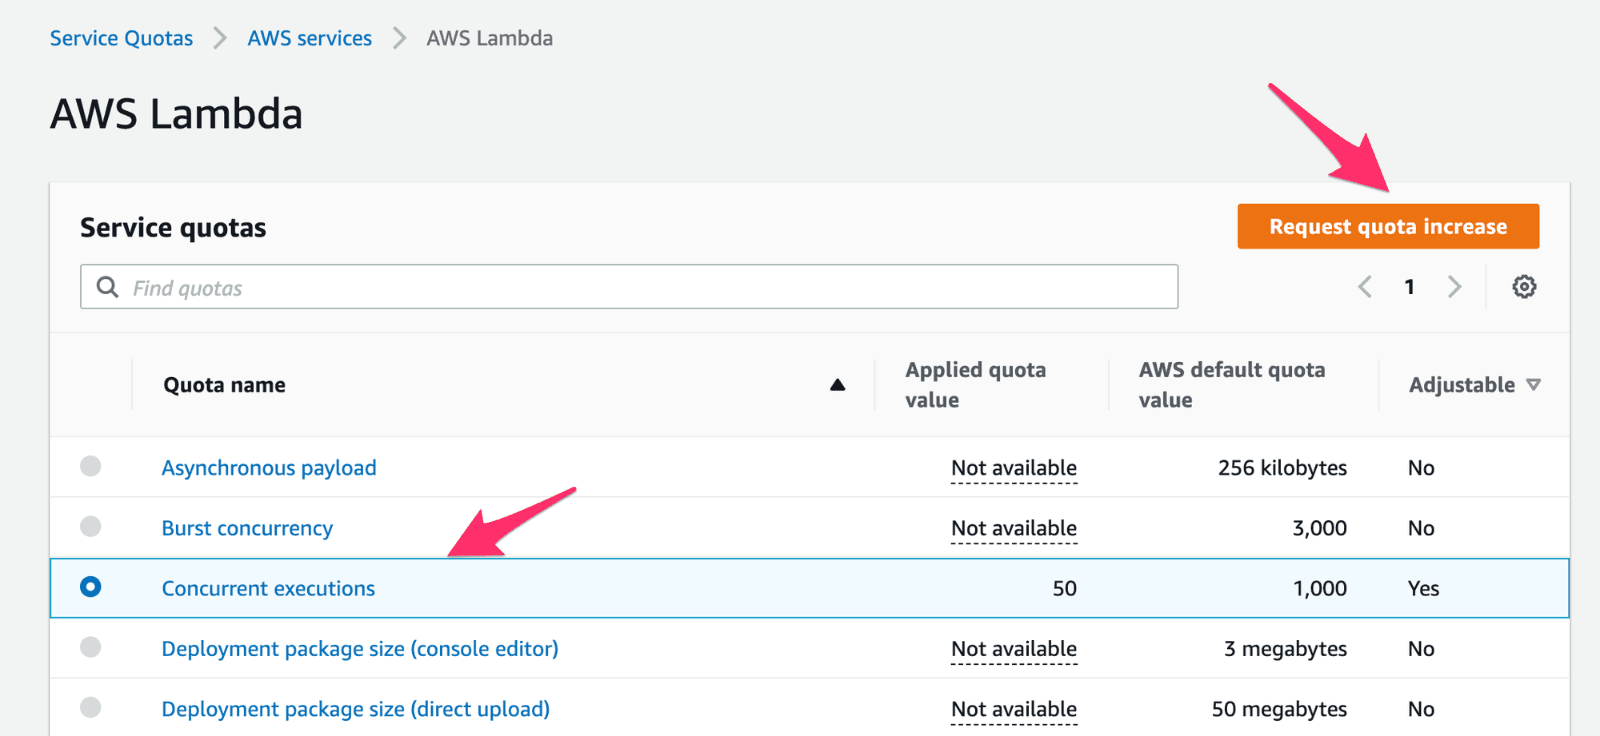
Go to Quotas
-
Select Concurrent Executions, then click Request quota increase
-
Enter a higher quota value, then click Request