Building and Deploying a Remix Application with Flightcontrol
This guide will walk you through the process of building and deploying a Remix application to AWS using Flightcontrol.
In particular, we will use the Remix Jokes Tutorial as a starting point. This project uses Prisma to connect to a SQLite database. We will change the database provider to be Postgres and then deploy the project to AWS.
Once we’re finished, you’ll have a Remix application running on AWS with a Postgres database.
If you have your own Remix project, it should deploy in a very similar manner. Feel free to skip ahead to the Deploying with Flightcontrol section.
Prerequisites
You’ll need to have Node.js (Node 16 or higher) and Postgres installed locally, as well as the following accounts:
Creating the Remix Jokes Application Locally
For context, see the Remix Jokes Tutorial - we’ll be using the final code from that tutorial as a starting point.
Remix provides an easy way to setup an example project with their command line tool:
npx create-remix@latest --template examples/_official-jokesYou should see something similar to the following set of questions and answers, which will create a new directory called jokes with the Remix application.
? Where would you like to create your app? jokes
? TypeScript or JavaScript? TypeScript
? Do you want me to run `npm install`? Yes
⠦ Creating your app…(⠂⠂⠂⠂⠂⠂⠂⠂⠂⠂⠂⠂⠂⠂⠂⠂⠂⠂) ⠧ idealTree:jokes: sill idealTree buildnpm WARN deprecated @npmcli/move-file@1.1.2: This functionality has been moved to @npmcli/fs

added 999 packages, and audited 1000 packages in 60s

257 packages are looking for funding
  run `npm fund` for details

found 0 vulnerabilities
💿 That's it! `cd` into "your-directory/jokes" and check the README for development and deploy instructions!
We do need to update the Node version and modify the database configuration before running the Jokes project locally.
Updating the Node Version
The Remix Jokes project uses Node 14, but we want to use Node 16. To update the Node version, we need to update the package.json file to include the following (instead of >=14):
"engines": {
  "node": ">=16"
}
After making the change to the package.json file, run npm install to update the dependencies.
Changing the Database Provider
Inside the jokes directory, you will find a schema.prisma file. This file defines the database schema for the application. By default, this Remix example uses SQLite, but we want to use Postgres. MySQL would also be an option.
Change the database section from:
datasource db {
  provider = "sqlite"
  url      = env("DATABASE_URL")
}
to:
datasource db {
  provider = "postgres"
  url      = env("DATABASE_URL")
}
You will also need to create a .env file in the jokes directory that includes the following:
DATABASE_URL="postgres://jeff@localhost:5432/remix_jokes"
SESSION_SECRET="some-random-string"
where jeff is your username. You can find your username by running whoami in your terminal on Linux or MacOS. For Windows, it will be the name of the folder in your C:\Users directory.
The session secret should also be a random string - not the default “remix-rulz” that can be found in the .env.example file.
Running Prisma Migrate Locally
Switching the database provider to Postgres means that we will need to delete the existing migrations folder in our jokes directory. This folder contains the migrations for SQLite, which we no longer need. For more about how Prisma manages switching database providers, see this page on the Prisma docs
After deleting the existing SQLite migrations folder, we need to run the following command:
npx prisma migrate dev --name initThis will create a new migrations folder with the Postgres migrations. You should see something similar to the following:
Environment variables loaded from .env
Prisma schema loaded from prisma/schema.prisma
Datasource "db": PostgreSQL database "remix_jokes", schema "public" at "localhost:5432"

Applying migration `20230620162445_init`

The following migration(s) have been created and applied from new schema changes:

migrations/
  └─ 20230620162445_init/
    └─ migration.sql

Your database is now in sync with your schema.

✔ Generated Prisma Client (4.16.0 | library) to ./node_modules/@prisma/client in
 47ms
After the database is migrated, we can run the application on our own computer.
Running the Jokes Web Application Locally
To run the application locally, you can run the following command:
npm run devThe jokes application should now be running at http://localhost:3000.
Creating a Git Repository
The last step is to create a Git repository for your project. Flightcontrol supports both GitHub and GitLab. Use your favorite tools to create a repository in either of those services, include your changes, and then push to your repository.
Your repository can be public or private. Flightcontrol connects with your Git provider to deploy your application, so you will need to give Flightcontrol access to your repository.
Deploying with Flightcontrol
Now that you have a Remix application to run, we can use Flightcontrol to deploy it to AWS.
To create a Flightcontrol account, sign up at the Flightcontrol Dashboard.
Creating a Project on Flightcontrol
If you haven’t already created a Flightcontrol account, you can do so at the Flightcontrol Dashboard.
Now that you have a Flightcontrol account, you can create a new project. Flightcontrol projects represent a single application or set of related applications that you want to deploy to AWS. Each project can have multiple environments, such as staging or production. Each environment can then have one or more services, such as a web application or a database.
To create a new project, click the Create Project button on the right hand side of the dashboard. If you don’t have any projects yet, Flightcontrol will show you the form to create one when you log in to Flightcontrol.
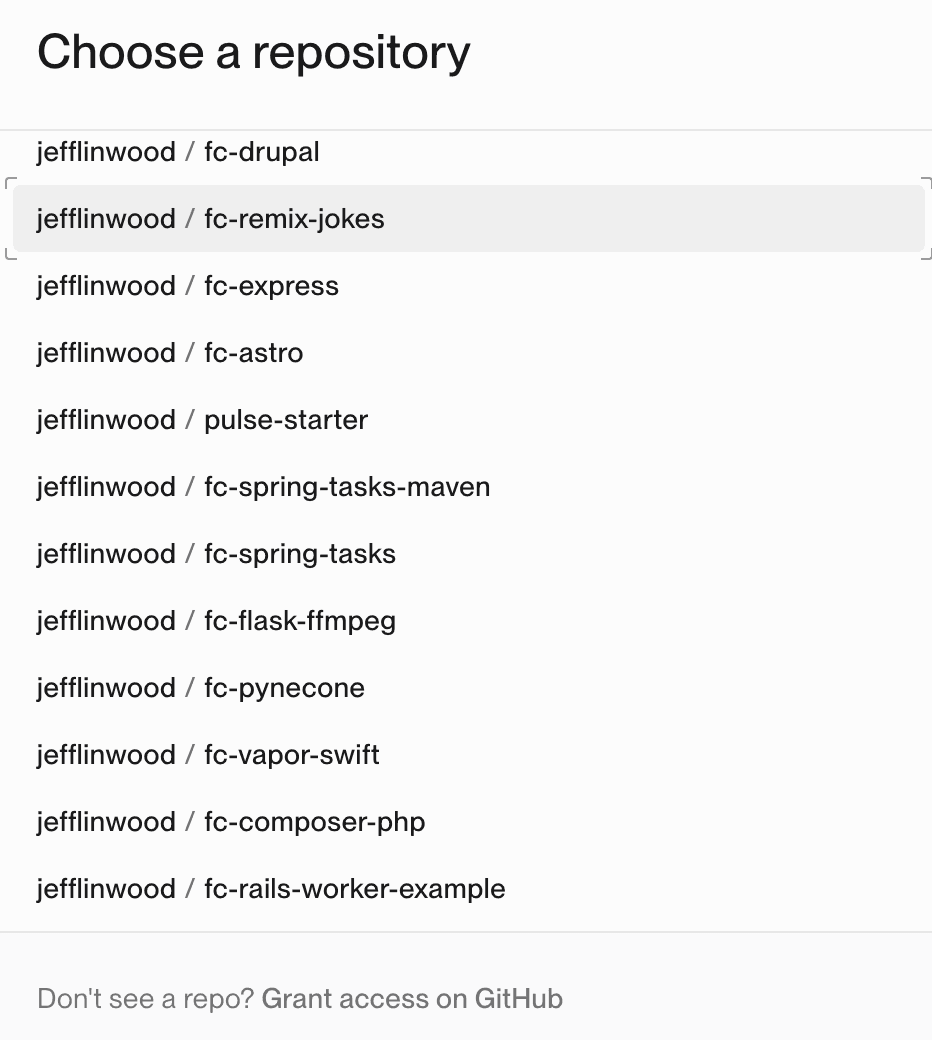
If you don’t have the GitHub repository you want to deploy in that list, click the button at the bottom of the form that takes you to the Flightcontrol GitHub app. On that web page, you can authorize specific repositories for Flightcontrol to access.
If you haven’t connected your Flightcontrol account to GitHub yet, let’s do that now.
Follow our guide on Connecting Flightcontrol to GitHub to walk you through the necessary steps.
Authorize access to the Remix repository you want to deploy. You don’t need to authorize access to all of your repositories.
Once the GitHub repository is selected, you will be taken to the next step in the project creation process.
Configure your Project
On the next screen, you configure the Flightcontrol Project. This includes the name of the project, the AWS account to use, the AWS region to deploy to, and the Git branch you want to pull from.
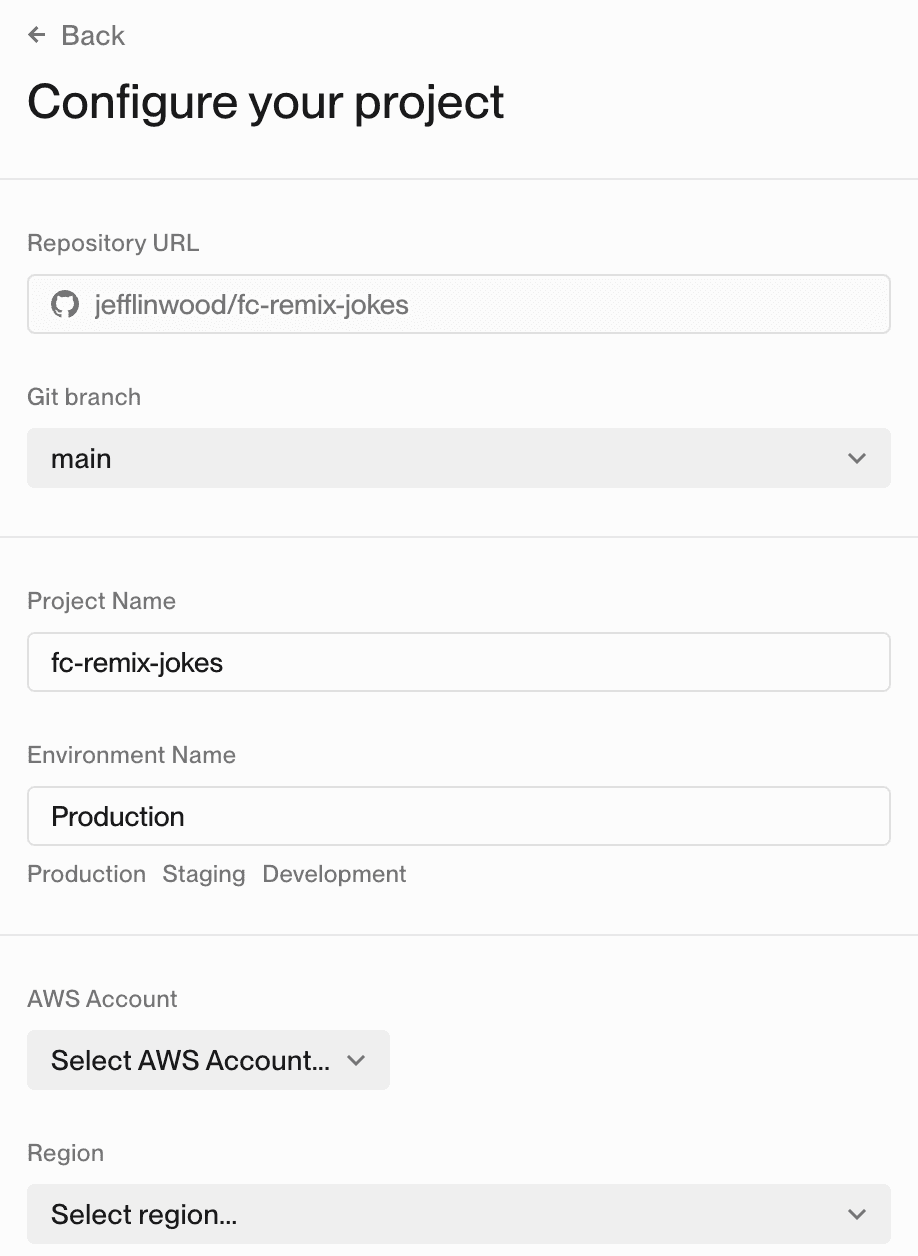
Choose your AWS account, and an AWS region, and then click the Next button.
Using the Remix Preset
On the next screen, you will see a list of presets. Presets are a set of services that Flightcontrol will configure for you. For this project, we will use the Remix preset.
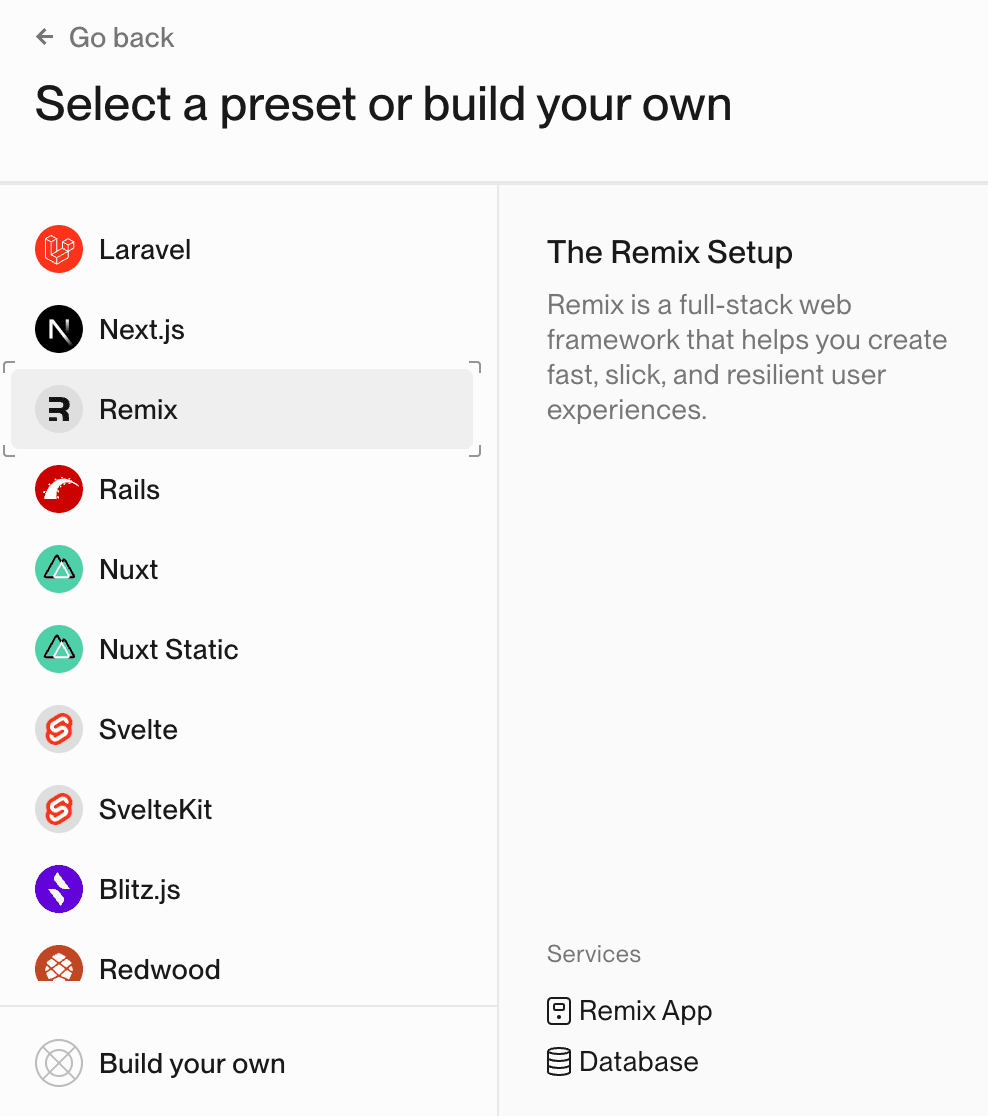
The Remix preset will configure the following services:
- Web Server with Amazon ECS Fargate
- Postgres Database with Amazon Relational Database Service (RDS)
The preset also sets an environment variable for the SESSION_SECRET, which is required for the Remix application to run.
Click the Remix preset, and Flightcontrol will take you to the next step.
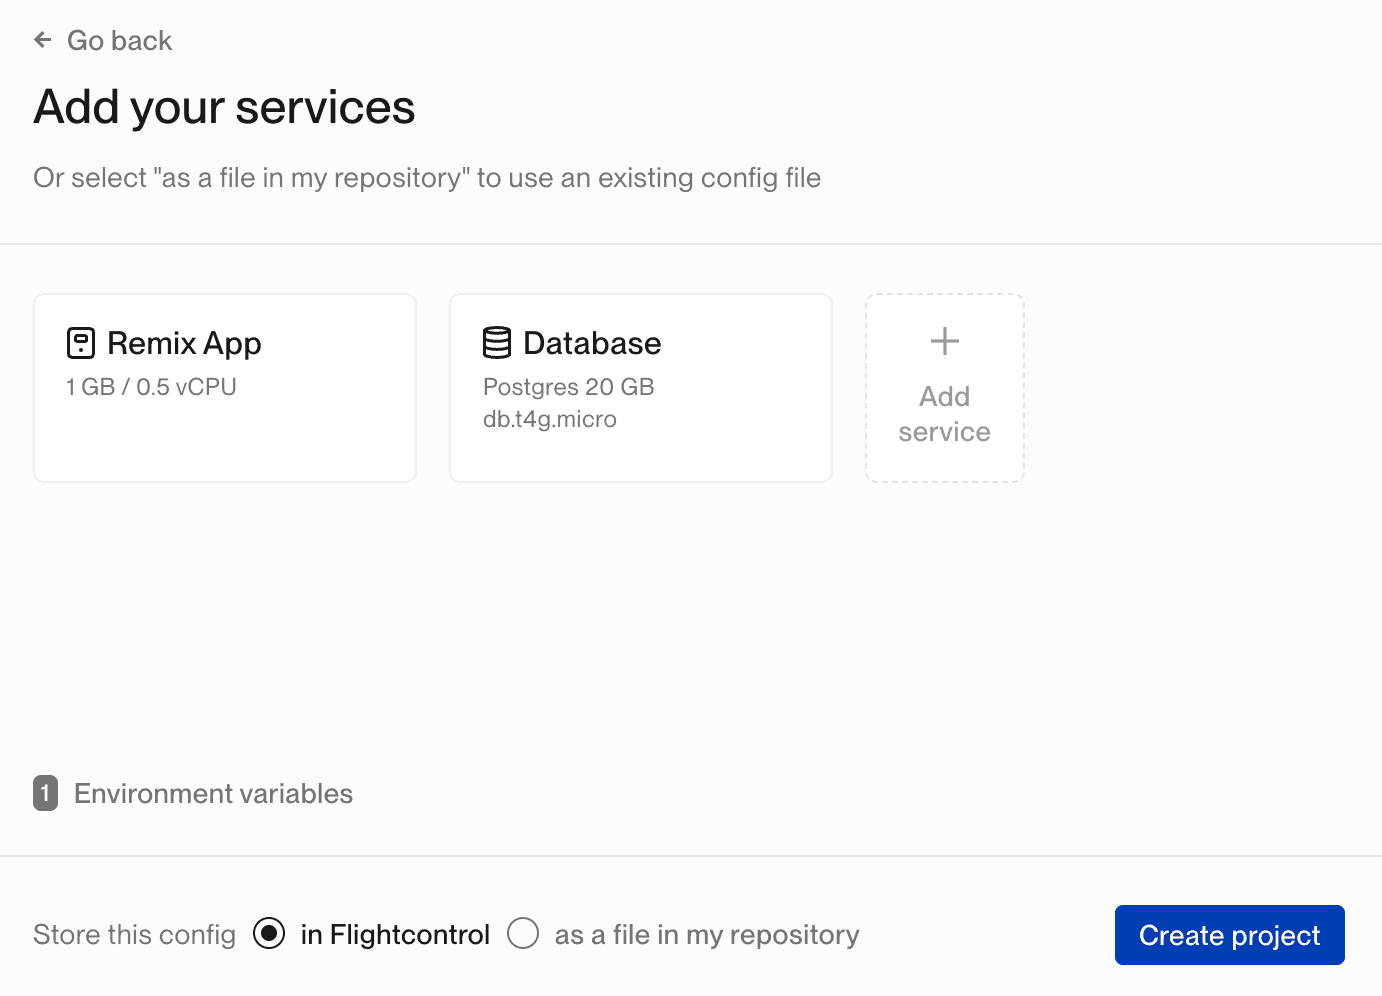
You can view the services that Flightcontrol will create. We will need to adjust the Remix App service to work with the Remix Jokes application.
Click the Remix App Service to view the configuration.
Modifying the Remix App Service
We need to provide a new build command for the Remix App service. The Remix Jokes application uses the following command to build the application:
npm run build && npx prisma migrate deploy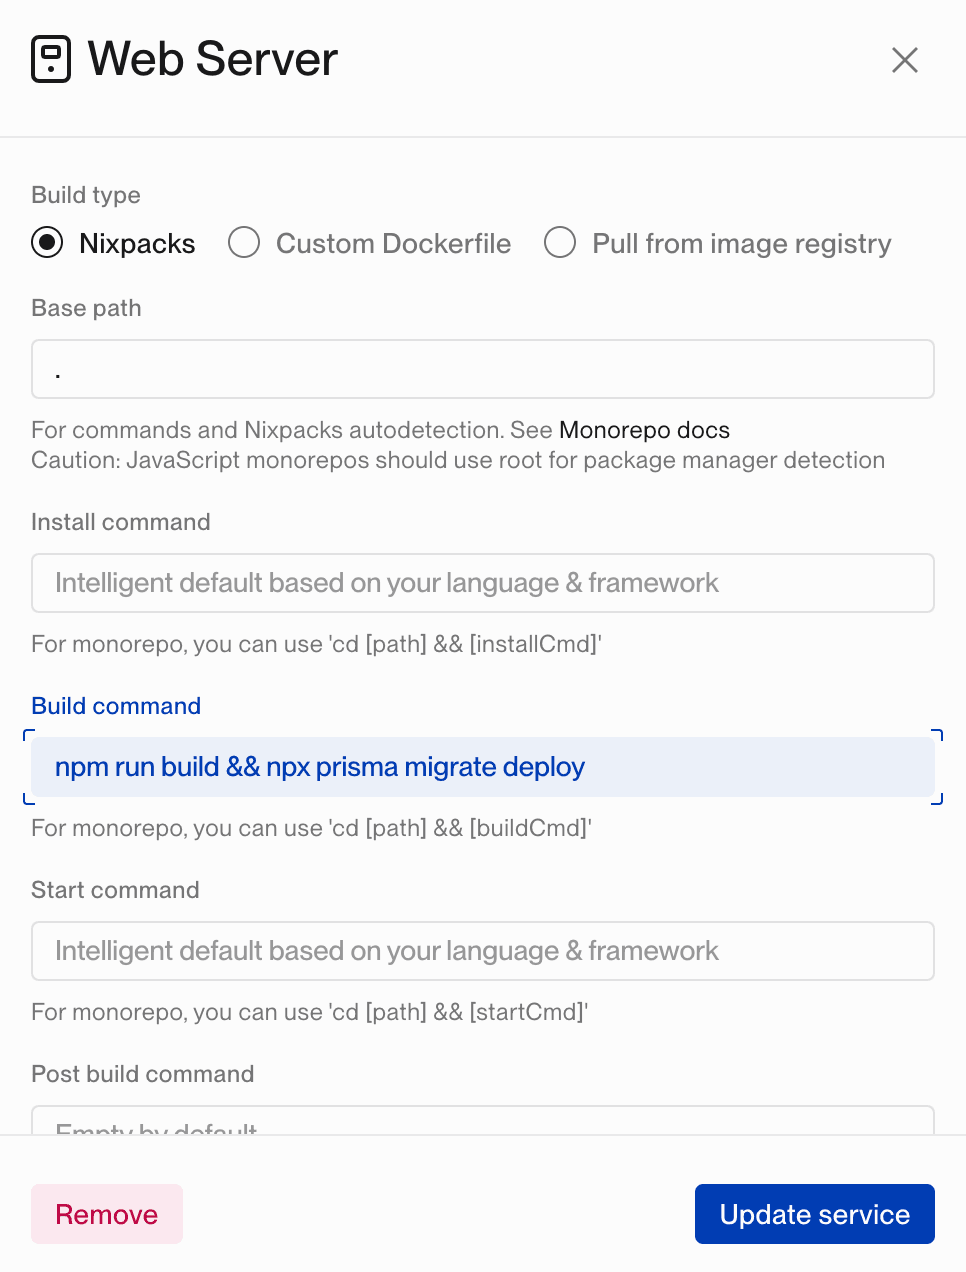
We also need to adjust the health check path. The Jokes application does not have a health check path at the default Remix preset path of /healthcheck, so we need to configure Flightcontrol to use the root path, /.
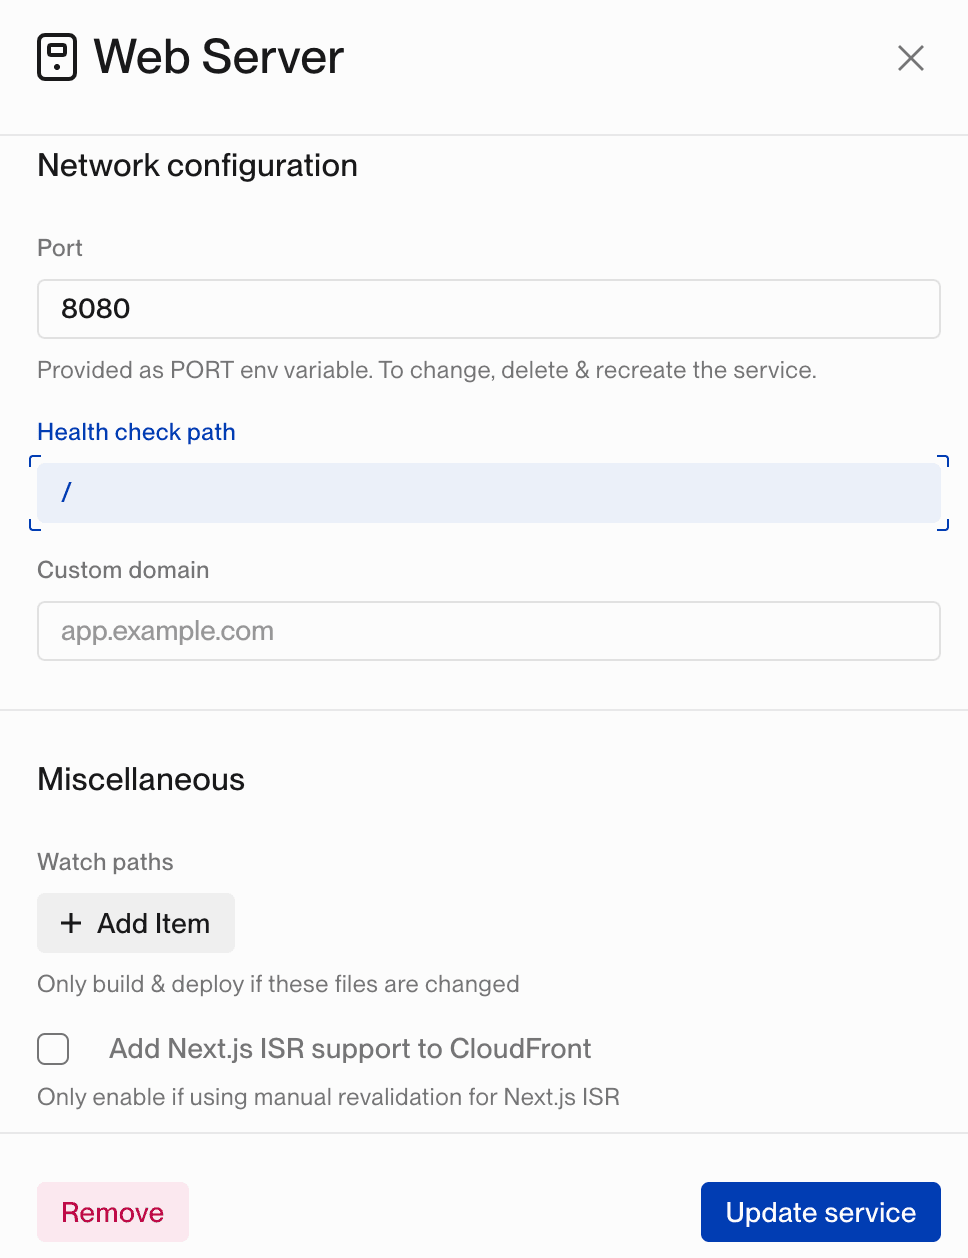
Once you finish configuration, click the Update service button to continue.
Launching the Project
You’ll be taken back to the project overview screen. You can review the configuration, and then click the Create Project button.
Flightcontrol will start the deployment process! Expect this to take between 10-20 minutes for the initial setup and deployment. Subsequent deployments will be much faster.
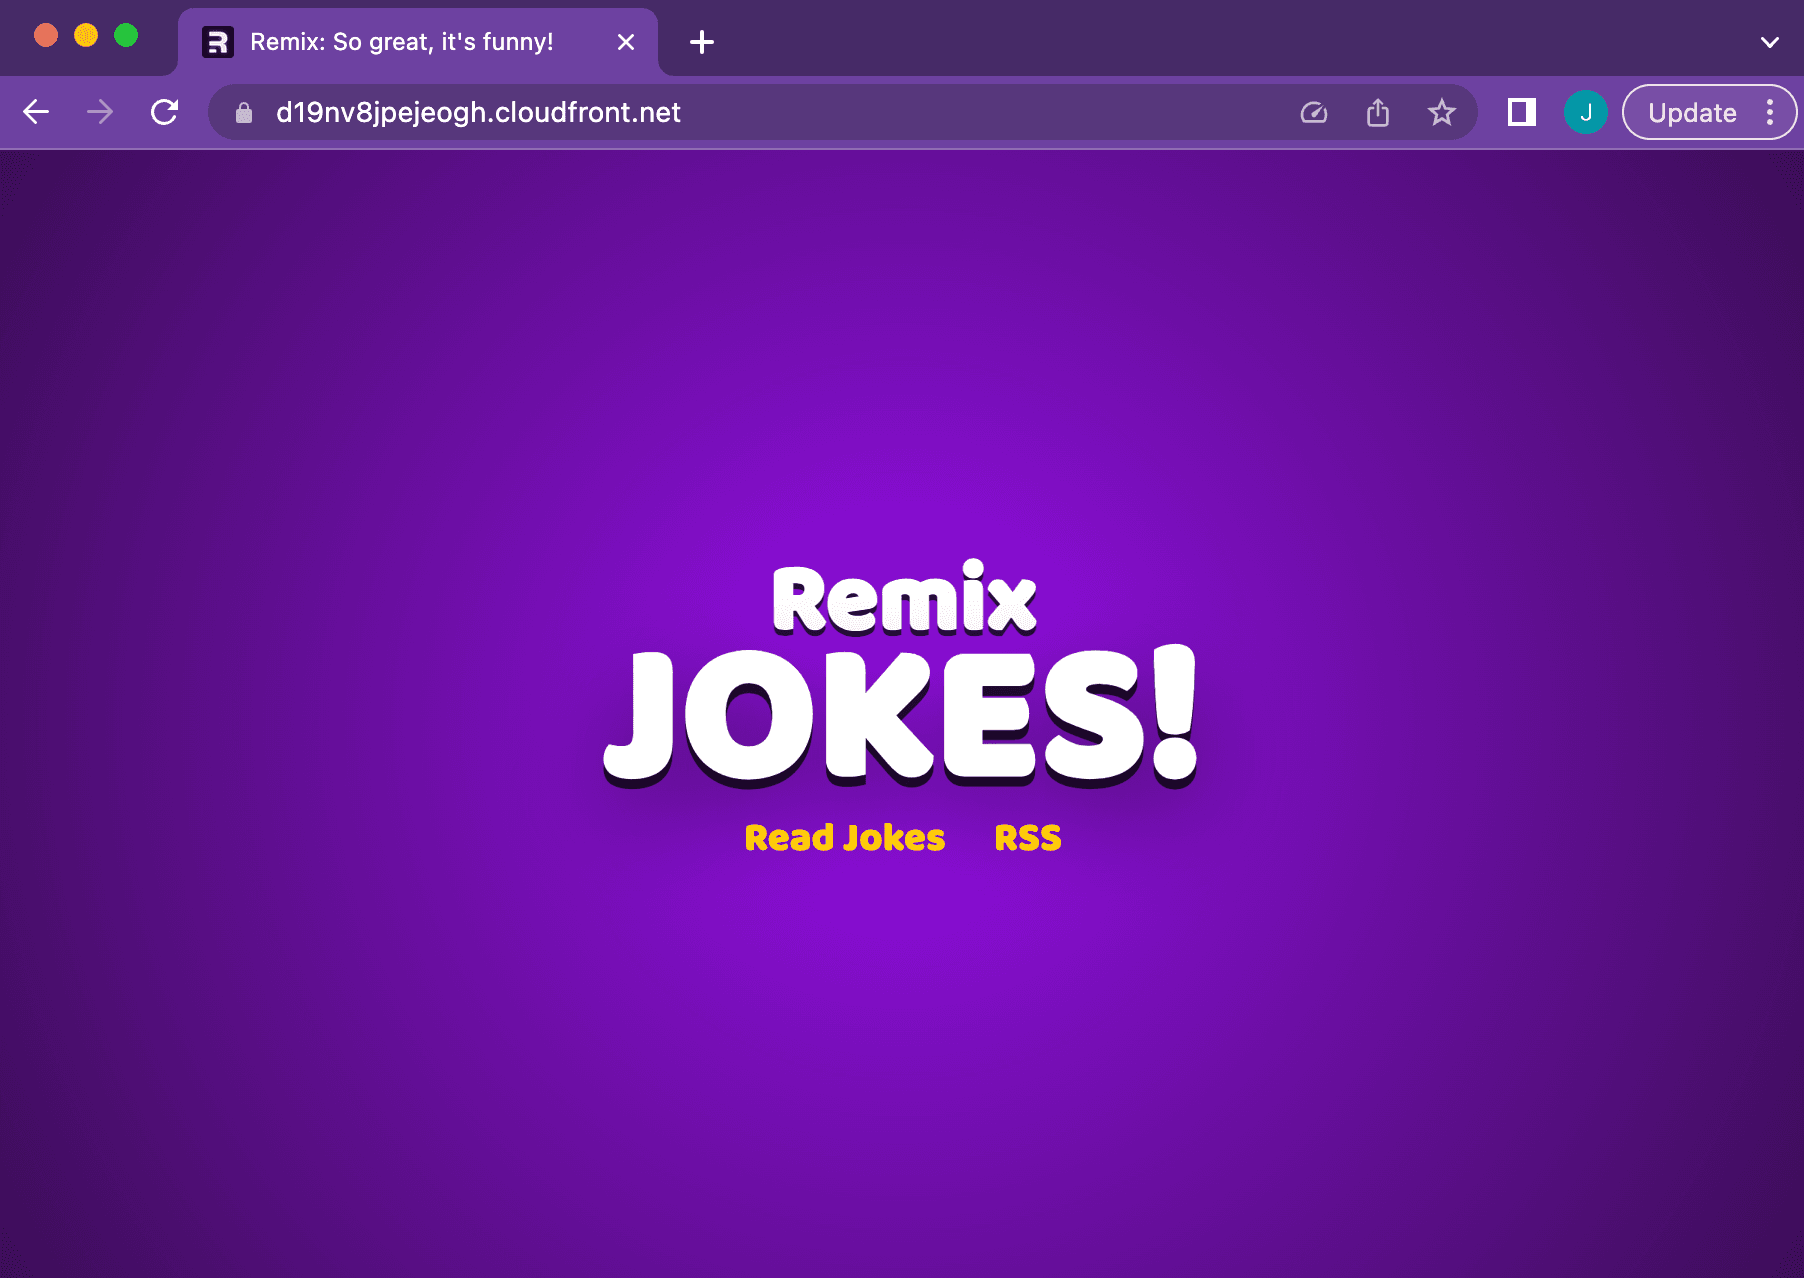
Once the deployment is complete, you will have a URL for your project! In the following screenshot, the URL is highlighted - you can find it in the Remix App service.
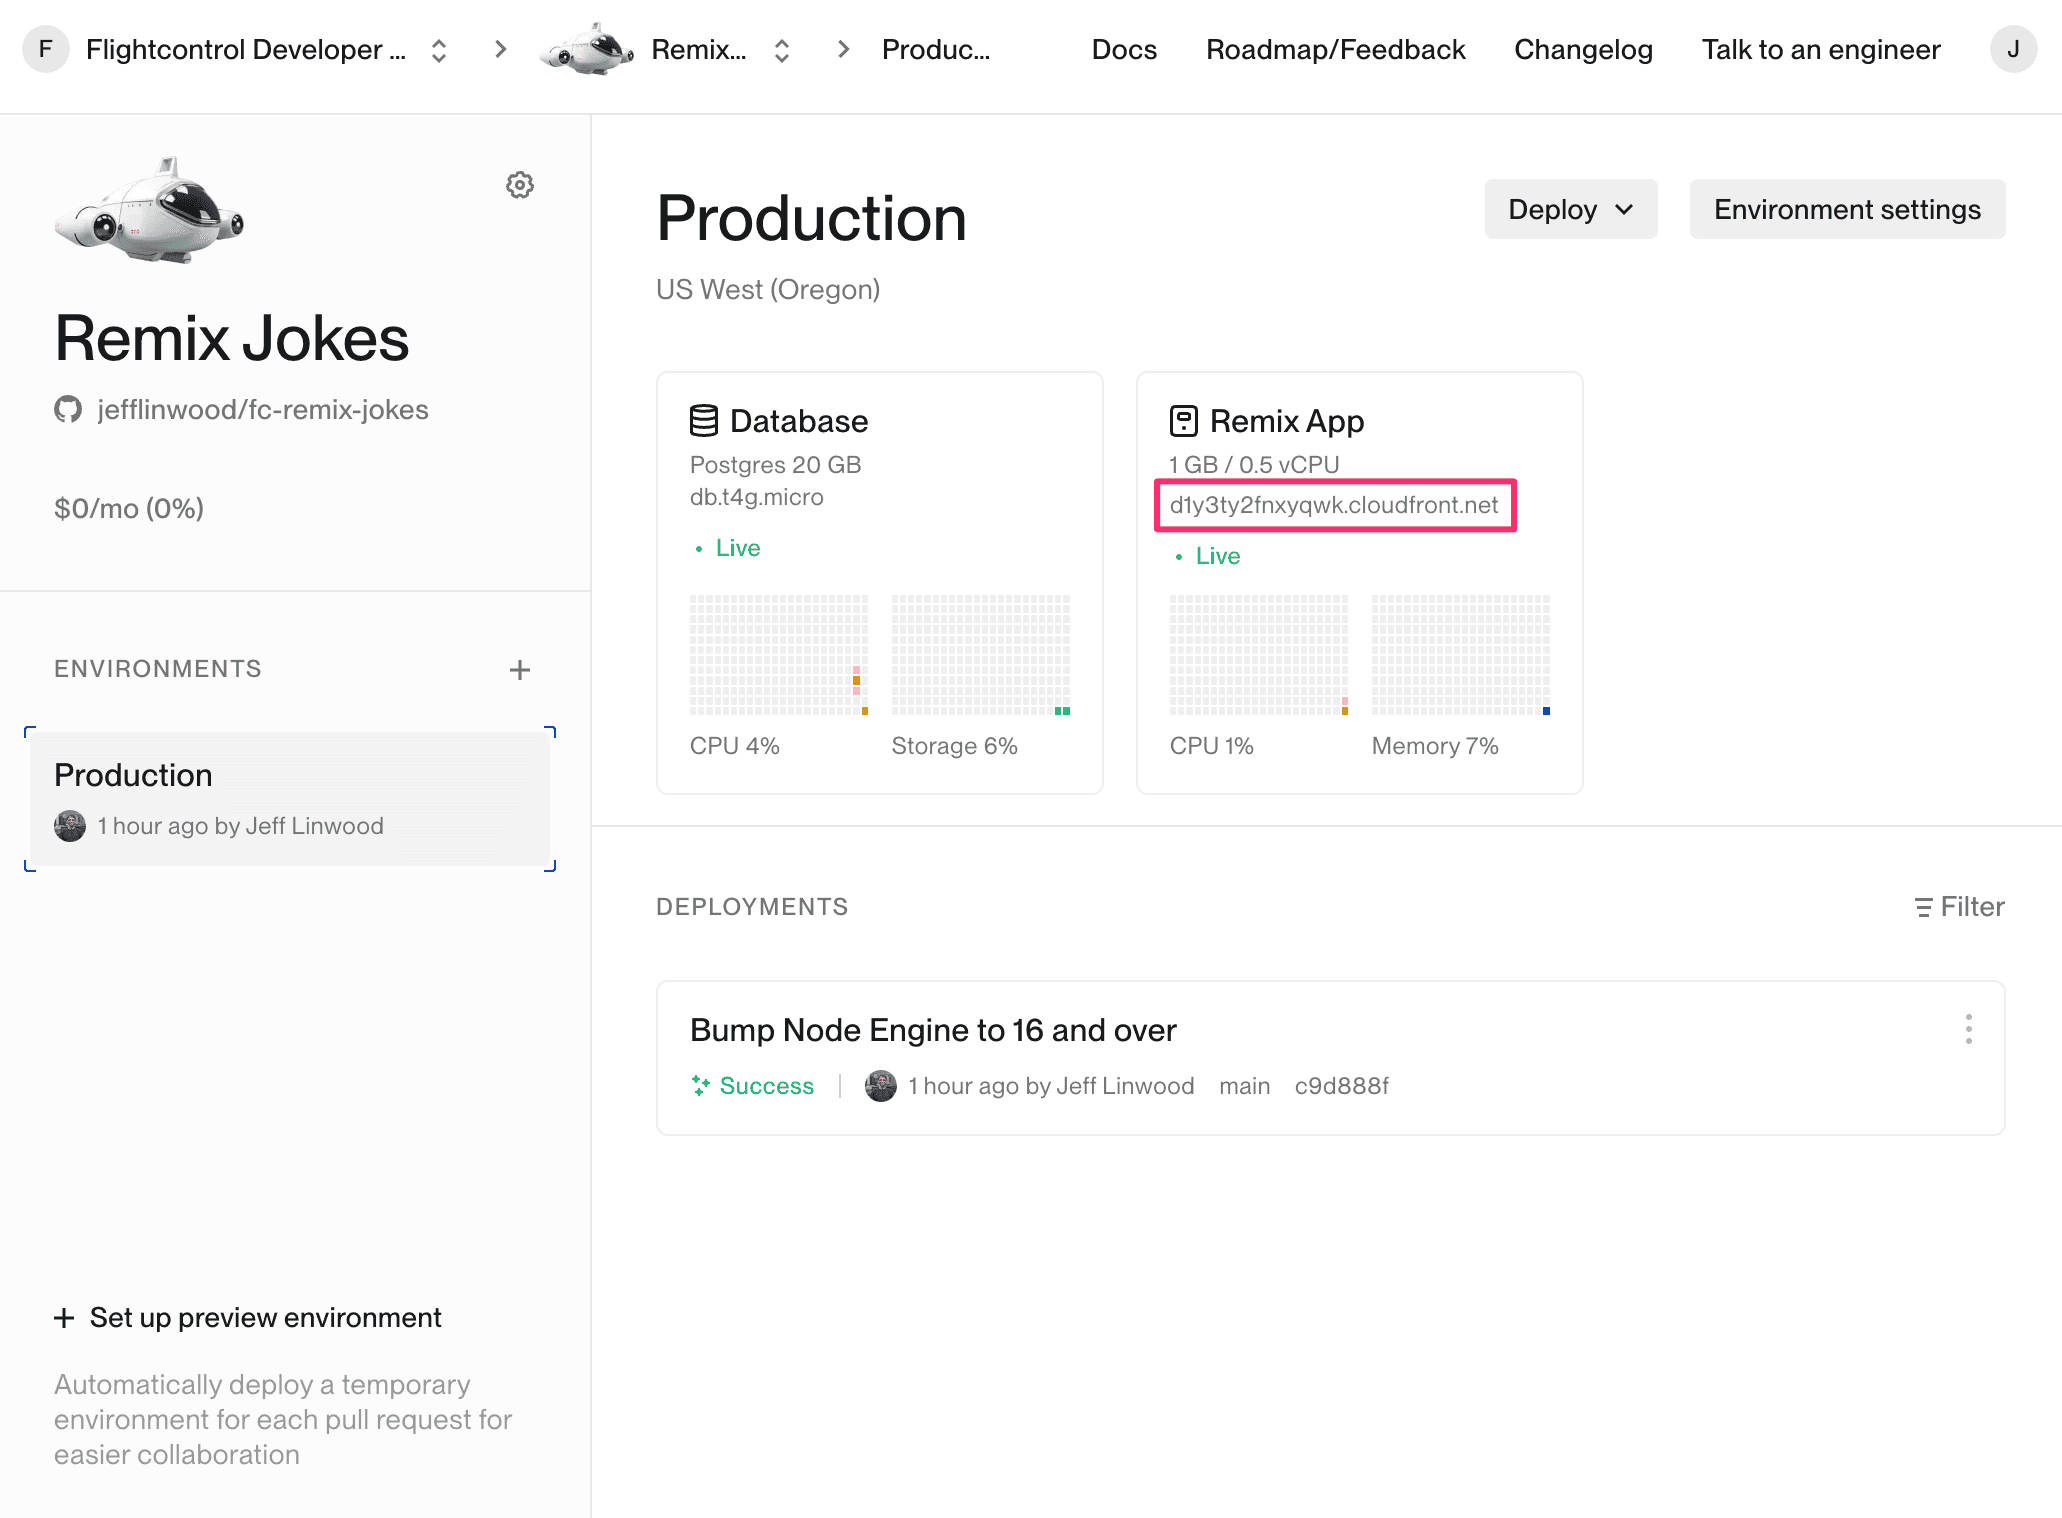
Visit the URL and enjoy your new Remix application running on AWS!
Next Steps
After a successful deployment with the Remix jokes application, make your own change to your GitHub repo and deploy it again! You’ll see a quick deployment time (compared to the initial launch) and your changes will be live.
After you’re finished, be sure to delete the project from Flightcontrol to avoid any unnecessary charges.
If you need any help getting this project (or any other project) up and running on Flightcontrol, please reach out to our support